Knowing that is possible to write a class which implements one or multiple simple interfaces,
even if those interfaces have one or more common methods in their contracts
(and in this case we only need to provide a single implementation),
once i was introduced to interfaces with default method implementation i questioned what happens if we try to write a class
which implements two interfaces that both have a default implementation for the same method signature.
The example
In the example i provide in this repo i have two interfaces InterfaceA & InterfaceB
which basically have two methods:
a default method void whereAmI(), that prints a simple string to help us understard which of the two default implementation is taken into consideration;
and a method void otherMethod() just to confirm what is being said in the abstract.
Then i have a class Test that implements the two interfaces and has a blank implementation of otherMethod().
Finally a Main class to make use of the Test class.
For sake of semplicity i didn’t organize the code in packages or inside of a src folder
Result
I tought that the implementation that would be taken into consideration was choosen based on the order in which i declare that class Test implements InterfaceA and InterfaceB, but in reality what i get is a compilation error:
Test.java:1: error: types InterfaceA and InterfaceB are incompatible;
public class Test implements InterfaceA, InterfaceB {
class Test inherits unrelated defaults for whereAmI() from types InterfaceA and InterfaceB
1 error
In this capstone, I predicted if the Falcon 9 first stage will land successfully. SpaceX advertises Falcon 9 rocket launches on its website with a cost of 62 million dollars; other providers cost upward of 165 million dollars each, much of the savings is because SpaceX can reuse the first stage. Therefore determining if the first stage will land and the cost of launch can help to determine if an alternate company may want to bid against SpaceX for a rocket launch. In this lab, I completed several stesp:
I collected data from an API and wrangled it into the right format
I gathered additional supplemental data via webscraping
I utilized a SQL database and Python/Juptyer Notebooks to perform EDA.
I created a number of useful visualizations
I employed Folium as a way to visualize launch sites and landmarks
I created a dashboard with Dash and Plotly for stakeholder use
I set up ML models to predict launch success and performed some feature engineering as well
I created a written report summarizing our findings and recommendations.
Skills (Developed & Applied)
Programming, Python, RDBMS & SQL, SQL (MySQL), Databases, Statistics, Probability, Linear Algebra, Numpy, Pandas, Seaborn, Matplotlib, Plotly, Dash, Folium, BeautifulSoup, Scikit-learn, Dataframes, ETL &| ELT & Data Pipelines, Automation, Webscraping, APIs, Data Modeling, EDA, Data Visualization, Data Summarization, Data Reporting, Dashboards, Classification, Supervised ML, Communication, Technical Writing
This repository contains an attempt to faithfully translate the Elligator 2 implementation in Loup Vaillant’s Monocypher to OCaml. Loup Vaillant was instrumental to the successful porting effort through his help and observations, and deserves a great thanks for helping make this possible.
Elligator 2 provides a mapping from x25519 public key (curve points) to bitstrings indistinguishable from uniformly random 256-bit bitstrings.
NB: Currently requires pinningopam pin add mirage-crypto-ec https://github.com/cfcs/mirage-crypto#raw_scalarmult
The main API entry points are:
val crypto_curve_to_hidden : Z.t -> int -> string
(** [crypto_curve_to_hidden point tweak] is the Elligator representative (aka encoding)
    of [point], "tweaked" with [tweak] whose lower 8 bits should be
    randomly chosen:
    - the LSB of [tweak] is used to select negation of [point]
    - the two MSB of [tweak] cast to a uint8 (bits 6 and 7, selected with & 0xc0) are used as padding of the two MSB of the little-endian representation of the representative.
*)

val crypto_hidden_to_curve : string -> Z.t
(** [crypto_hidden_to_curve representative] is the point corresponding to [representative].
    Any random 256-bit string can be provided as [representative].
    The tweak is not currently recovered.
*)
Inspired by dsaltares/fetch-gh-release-asset GitHub Action and several others,
this action downloads all assets from a Release, without needing to build a Docker container.
This results in a faster job execution, since GitHub Actions Runner will execute the JavaScript code directly. 🙂
Optional GitHub Token to authenticate as. Defaults to ${{ secrets.GITHUB_TOKEN }}
repository
The org/repo containing the release. Defaults to the current repository.
release-id
The Release ID version to fetch. If no tag is specified, defaults to latest release.
tag
The Git tag name to fetch the release from.
files
Required The name of the file/s to download as a list, or single file.
If files is set to '*', all assets are downloaded.
You can use * wildcard to select a file pattern.
files: |
  config.json
  program-*.exe
target
Target file path. If several files are specified, this is the folder to download the files (recursive folders will be created if don’t exist).
If files contains a single file, this is the full path to download the file (recursive folders will be created).
download
Set to false if you do not want to download files, output assets still will contain selected files.
Outputs
name
The title / name of the selected release.
body
The description / body of the selected release.
tag
The Git tag value of the selected release. Useful to attempt knowing the version if you selected latest.
این ریپازیتوری حاوی قالبی جکیلی است که برای [وبسایت شخصی](https://mehdix.ir) خودم ساختهام. انگیزه ایجاد آن هم کمک به افرادی است که سعی دارند سایتی شبیه آن برای خودشان بسازند و پاسخ به سوالاتی است که طی سالهای گذشته در مورد نحوه ساخت آن پیوسته دریافت کردهام. در ادامه روشهای استفاده و سوالات رایج را میآورم. در راهنمای انگلیسی هم نحوه نصب را نوشتهام.
نحوه استفاده
این ریپازیتوری را به دو طریق میتوانید استفاده کنید. روش اول اینست که مستقیما این ریپازیتوری را فورک کنید. روش دوم استفاده از جم روبی این قالب است. هر دو را شرح میدهم.
استفاده به روش فورک
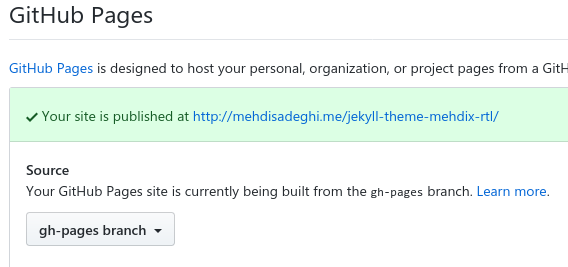
فورک کنید و بعد کلون کنید و اسم و رسم سایت و محتوا را تغییر بدهید و به عنوان یک سایت جدید استفاده کنید. در این روش باید بعد از فورک در ریپازیتوری جدید داخل اکانت خودتان GitHub Pages را فعال کنید و برنج gp-pages را بعنوان برنچ حاوی سایت استاتیک انتخاب کنید (جایی که خروجی بیلد جکیل قرار دارد).
بدون هیچ تغییر دیگری همینکه تغییرات خودتان را پوش کنید سایت بیلد میشود. توجه داشته باشید که اگر از دامنه شخصی بجای دامنهی گیتهاب استفاده میکنید بخش Patch Jekyll config را از فایل گیتهاب اکشنز حذف کنید.
حسن این روش اینست که ساده و سرراست است. لازم نیست با پیچیدگیهای جکیل و تنظیمات قالب را بدانید. عیبش هم اینست که تغییرات جدید در تم را دریافت نمیکند که به نظرم اهمیت چندانی ندارد.
استفاده از طریق روبی جم
ساختار جکیل بکار رفته در این ریپازیتوری به صورت یک جم روبی در دسترسی است. در اینصورت باید یک وبسایت جکیل ساخت و در فایل _config.yml قالب را تغییر داد. این کاری است که در ریپازیتوری وبسایت خودم انجام دادهام. این روش را در شرح انگلیسی نوشتهام.
حسن این روش اینست که میتوان نسخههای جدیدتر تم را به صورت نصب نسخههای جدیتر جم روبی دریافت کرد. عیبش آنست که قالب جکیل به صورت تم محدود است. مثلا جکیل صفحه ۴۰۴ را از داخل جم قالب نمیخواند، همینطور برخی فایلها مانند فایلهای تولید فید را. در ضمن باید تمام تنظیمات بیلد سایت را هم جداگانه انجام داد.
برخی سوالات رایج
تقویم شمسی روی گیتهاب کار نمیکنه. پلاگینها کار نمیکنند!
بیلدر پیشفرض گیتهاب نمیتواند این سایت را بیلد کند چون پلاگینها را ندارد. از تنظیمات بیلد همین وبسایت استفاده کنید که بالاتر شرح دادم.
وبسایت اصلا روی گیتهاب کار نمیکند! گیتهاب برنج gh-pages را اصلا برای وبسایت بکار نمیبرد!
اگر اسم ریپازیتوری همان یوزرنیم شما باشد گیتهاب سایت را از برنج مستر خواهد ساخت. گیتهاب به این سایتها User page میگوید و در غیر اینصورت Project page. روشهایی که برای بیلد توضیح دادم فقط برای Project page کار میکند. یعنی یوزرنیم و نام ریپازیتوری سایت نباید یکسان باشد. برای یوزرپیج احتمالا باید سورس را در یک برنج غیر از مستر ذخیره کنید و خروجی بیلد وبسایت را پوش کنید در برنج مستر. امتحان نکردهام.
کامنتهای استاتیک کار نمیکند!
روی گیتهاب اصلا نمیشود. من روی نتلیفای این کار را انجام دادهام و در مقالهای روش کار را شرح دادهام.
This is the jekyll theme used for my personal Persian website. Persian aka Farsi is written right-to-left, however some people use Roman script to write Persian language in messaging applications and social networks.
During the last few years people have reached out to me asking how to setup a persian Jekyll website with Jalali calendar support. Since Jekyll now supports themes, I created this theme based on my website to help others to bootstrap their own websites.
This repository can be of use to anybody willing to build a new right to left website. I gradually fix issues which I came across while writing new posts in my website. This website is produced using Jekyll static site generator.
Installation
Take the following steps to make your own website based on this theme. First of all, create your website if you have not already:
$ jekyll create mywebsite
Then add this line to your Jekyll site’s Gemfile:
gem"jekyll-theme-mehdix-rtl","~> 3.0"
And add this line to your Jekyll site’s _config.yml:
theme: jekyll-theme-mehdix-rtl
And then execute:
$ bundle install
Or install it yourself as:
$ gem install jekyll-theme-mehdix-rtl
You can override theme style by creating matching files with the same structure inside your Jekyll source tree. See Jekyll Themes docs for more information on that.
Further customization
Styles
You can create a _sass folder and put a file named custom.scss in it. This theme will load it by default.
Layouts
The following layouts are available for your homepage:
home: post titles along with an excerpt and pagination
minimal: only post titles
Comments
This theme supports three comment systems. First one is disqus.
In order to enalbe disqus comments add comment_system:disqus and disqus_shortname:DISQUS_USERNAME to your _config.yml file.
The second approach is static comments. In order to enable static comments add comment_system:static to the config
file. This will load commends from _data/comments folder. There should be one YAML file per post. Name of the file
should be the uuid of the post (each post must have a uuid in its front matter). The following sample defines two
comments for post with uuid 0b64d07f-6c08-475b-a509-463df5458039:
For the time being I am using Netlify to handle custom comment forms on each post page and add them to the
comments using the netlify_comments.py script.
Forcing RTL code blocks
If you put code blocks and they appear incorrectly, you can use Markright gem. First add it to your Gemfile:
gem"jekyll-markright"
And change your config.yml respectively:
markdown: Markright
Footer
If any of the following ids is present in the config a corresponding item will be added to the footer:
github_username
twitter_username
feedburner_id
email
Analytics
In order to send pageviews to Google Analytics set your ID in the _config.yml: google_analytics_id: YOUR_ID
SEO
Make sure to fill entries in the config file correctly to get a better search engine experience.
Specially fill the SEO section with your Github and Twitter usernames. Don’t forget to add lang
and logo entries. See jekyll-seo-tag for further
information.
در هنگام گزارش مشکلات یا شرح تغییرات، فارسی نوشتن خیلی هم خوب است. فقط یک شرط دارد! متن را درون تگ راست به چپ شده بنویسید که درست نمایش داده بشود. اگر هم دوست دارید انگلیسی بنویسید هیچ اشکالی ندارد.
It produces the quarkus-run.jar file in the build/quarkus-app/ directory.
Be aware that it’s not an über-jar as the dependencies are copied into the build/quarkus-app/lib/ directory.
The application is now runnable using java -jar build/quarkus-app/quarkus-run.jar.
If you want to build an über-jar, execute the following command:
REST (guide): A Jakarta REST implementation utilizing build time processing and Vert.x. This extension is not compatible with the quarkus-resteasy extension, or any of the extensions that depend on it.
This basic example came from a coding exercise I did while interviewing for an iOS Developer position at Inspirato
The reason I made this exercise a public repo is not to provide other candidates that may not be qualified a solution, but rather to provide an example of using Unbox with Alamofire in Swift 3! Plus I had fun doing it!
IMO I think this is a very simple/clean solution to a very common task iOS developers face regularly. The serialization is handled very nicely as property types are automatically detected and decoded. All missing or mismatched values are gracefully handled through a single exception type, making error handling super simple!
Your models aren’t saturated with optional properties, that you later have to unwrap, guard or add more LOC at some point.
And best of all its a light weight solution that you can use with your protocol oriented swift apps!
This example is simply meant to critique and/or get ideas off of. I ended up NOT receiving an offer from them, stating something along the lines of your code was very elegant and clean but it didn’t touch on the areas they were looking for. Whatever that means, I’m assuming because I failed to implement AutoLayout on a couple screens, simply spaced it!
Before you can build this project, you must install and configure the following dependencies on your machine:
Node.js: We use Node to run a development web server and build the project.
Depending on your system, you can install Node either from source or as a pre-packaged bundle.
Yarn: We use Yarn to manage Node dependencies.
Depending on your system, you can install Yarn either from source or as a pre-packaged bundle.
After installing Node, you should be able to run the following command to install development tools.
You will only need to run this command when dependencies change in package.json.
yarn install
We use yarn scripts and Webpack as our build system.
Run the following commands in two separate terminals to create a blissful development experience where your browser
auto-refreshes when files change on your hard drive.
./mvnw
yarn start
Yarn is also used to manage CSS and JavaScript dependencies used in this application. You can upgrade dependencies by
specifying a newer version in package.json. You can also run yarn update and yarn install to manage dependencies.
Add the help flag on any command to see how you can use it. For example, yarn help update.
The yarn run command will list all of the scripts available to run for this project.
Service workers
Service workers are commented by default, to enable them please uncomment the following code.
The service worker registering script in index.html
<script>
    if ('serviceWorker' in navigator) {
        navigator.serviceWorker
        .register('./sw.js')
        .then(function() { console.log('Service Worker Registered'); });
    }
</script>

Note: workbox creates the respective service worker and dynamically generate the `sw.js`

### Managing dependencies

For example, to add [Leaflet][] library as a runtime dependency of your application, you would run following command:

    yarn add --exact leaflet

To benefit from TypeScript type definitions from [DefinitelyTyped][] repository in development, you would run following command:

    yarn add --dev --exact @types/leaflet

Then you would import the JS and CSS files specified in library's installation instructions so that [Webpack][] knows about them:
Edit [src/main/webapp/app/vendor.ts](src/main/webapp/app/vendor.ts) file:
~~~
import 'leaflet/dist/leaflet.js';
~~~

Edit [src/main/webapp/content/css/vendor.css](src/main/webapp/content/css/vendor.css) file:
~~~
@import '~leaflet/dist/leaflet.css';
~~~
Note: there are still few other things remaining to do for Leaflet that we won't detail here.

For further instructions on how to develop with JHipster, have a look at [Using JHipster in development][].

### Using angular-cli

You can also use [Angular CLI][] to generate some custom client code.

For example, the following command:

    ng generate component my-component

will generate few files:

    create src/main/webapp/app/my-component/my-component.component.html
    create src/main/webapp/app/my-component/my-component.component.ts
    update src/main/webapp/app/app.module.ts

### Doing API-First development using swagger-codegen

[Swagger-Codegen]() is configured for this application. You can generate API code from the `src/main/resources/swagger/api.yml` definition file by running:
```bash
./mvnw generate-sources
Then implements the generated interfaces with @RestController classes.
To edit the api.yml definition file, you can use a tool such as Swagger-Editor. Start a local instance of the swagger-editor using docker by running: docker-compose -f src/main/docker/swagger-editor.yml up -d. The editor will then be reachable at http://localhost:7742.
To optimize the lookbrbackendv2 application for production, run:
./mvnw -Pprod clean package
This will concatenate and minify the client CSS and JavaScript files. It will also modify index.html so it references these new files.
To ensure everything worked, run:
UI end-to-end tests are powered by Protractor, which is built on top of WebDriverJS. They’re located in src/test/javascript/e2e
and can be run by starting Spring Boot in one terminal (./mvnw spring-boot:run) and running the tests (yarn run e2e) in a second one.
Other tests
Performance tests are run by Gatling and written in Scala. They’re located in src/test/gatling and can be run with:
You can use Docker to improve your JHipster development experience. A number of docker-compose configuration are available in the src/main/docker folder to launch required third party services.
For example, to start a mysql database in a docker container, run:
docker-compose -f src/main/docker/mysql.yml up -d
To stop it and remove the container, run:
docker-compose -f src/main/docker/mysql.yml down
You can also fully dockerize your application and all the services that it depends on.
To achieve this, first build a docker image of your app by running:
./mvnw verify -Pprod dockerfile:build
Then run:
docker-compose -f src/main/docker/app.yml up -d
For more information refer to Using Docker and Docker-Compose, this page also contains information on the docker-compose sub-generator (jhipster docker-compose), which is able to generate docker configurations for one or several JHipster applications.
Continuous Integration (optional)
To configure CI for your project, run the ci-cd sub-generator (jhipster ci-cd), this will let you generate configuration files for a number of Continuous Integration systems. Consult the Setting up Continuous Integration page for more information.
😥 Tired of managing student attendance with paper and spreadsheets?
The Mbm Attendance Application is here to streamline the process!😀
Welcome to the repository.
This project is an attendance management application developed for MBM UNIVERSITY as a part of the Minor Project. The application aims to streamline the process of tracking and managing student attendance efficiently.
Features
User Authentication: Secure user authentication system for students and faculty members.
Dashboard: Intuitive dashboard for easy navigation and access to attendance-related functionalities.
Mark Attendance: Faculty members can mark attendance for their respective classes.
View Attendance: Students can view their attendance records for individual subjects.
Attendance Reports: Generate detailed reports of attendance for specific periods or subjects.
Notifications: Automated notifications for absentees and low attendance percentages.
Technologies Used
Frontend: HTML, CSS, JavaScript, ReactJs, vite
Backend: Node.js, Express.js
Database: MySQL
Authentication: JSON Web Tokens (JWT)
Prerequisites
Node.js (v20.11): You can use the package manager of your choice.
Tests need to pass in Node 20 and 22.
Setup Instructions
Clone the repository:
git clone https://github.com/aakashsharma003/Mbm-Attendance-Application.git
Install dependencies: Run the below two commands in 2 different terminal
backend
cd Mbm-Attendance-Application cd backend npm install
frontend
cd Mbm-Attendance-Application cd frontend npm install


 https://github.com/stackbit-projects/friendly-hickory-20205