Author: 59ct60jt49vj

  • machine-kvm2-driver

    This is developed using https://github.com/dhiltgen/docker-machine-kvm and https://github.com/kubernetes/minikube/tree/master/pkg/drivers/kvm

    docker-machine-kvm2

    KVM2 driver for docker-machine

    This driver leverages the new plugin architecture being
    developed for Docker Machine.

    Quick start instructions

    • Install libvirt and qemu-kvm on your system (e.g., sudo apt-get install libvirt-bin qemu-kvm)
      • Add yourself to the libvirtd group (may vary by linux distro) so you don’t need to sudo
    • Install docker-machine
    • Go to the
      releases
      page and download the docker-machine-driver-kvm binary, putting it
      in your PATH.
    • You can now create virtual machines using this driver with
      docker-machine create -d kvm myengine0.

    Build from Source

    $ yum install -y libvirt-devel curl git gcc  //CentOS,Fedora
    
    $ apt-get install -y libvirt-dev curl git gcc //Ubuntu
    
    $ make build
    

    Capabilities

    Images

    By default docker-machine-kvm uses a boot2docker.iso as guest os for the kvm hypervisior. It’s also possible to use every guest os image that is derived from boot2docker.iso as well.
    For using another image use the --kvm-boot2docker-url parameter.

    Dual Network

    • eth1 – A host private network called docker-machines is automatically created to ensure we always have connectivity to the VMs. The docker-machine ip command will always return this IP address which is only accessible from your local system.
    • eth0 – You can specify any libvirt named network. If you don’t specify one, the “default” named network will be used.
      • If you have exotic networking topolgies (openvswitch, etc.), you can use virsh edit mymachinename after creation, modify the first network definition by hand, then reboot the VM for the changes to take effect.
      • Typically this would be your “public” network accessible from external systems
      • To retrieve the IP address of this network, you can run a command like the following:
      docker-machine ssh mymachinename "ip -one -4 addr show dev eth0|cut -f7 -d' '"

    Driver Parameters

    Here are all currently driver parameters listed that you can use.

    Parameter Description
    –kvm-cpu-count Sets the used CPU Cores for the KVM Machine. Defaults to 1 .
    –kvm-disk-size Sets the kvm machine Disk size in MB. Defaults to 20000 .
    –kvm-memory Sets the Memory of the kvm machine in MB. Defaults to 1024.
    –kvm-network Sets the Network of the kvm machinee which it should connect to. Defaults to default.
    –kvm-boot2docker-url Sets the url from which host the image is loaded. By default it’s not set.
    –kvm-cache-mode Sets the caching mode of the kvm machine. Defaults to default.
    –kvm-io-mode-url Sets the disk io mode of the kvm machine. Defaults to threads.


    Visit original content creator repository
    https://github.com/praveenkumar/machine-kvm2-driver

  • Send


    Send!

    macOS GUI and share extension for 🦊 Send
    Version: 1.12.2

    Download now »
    Report issues

    -----------------------------------------------------

    🔔 Information

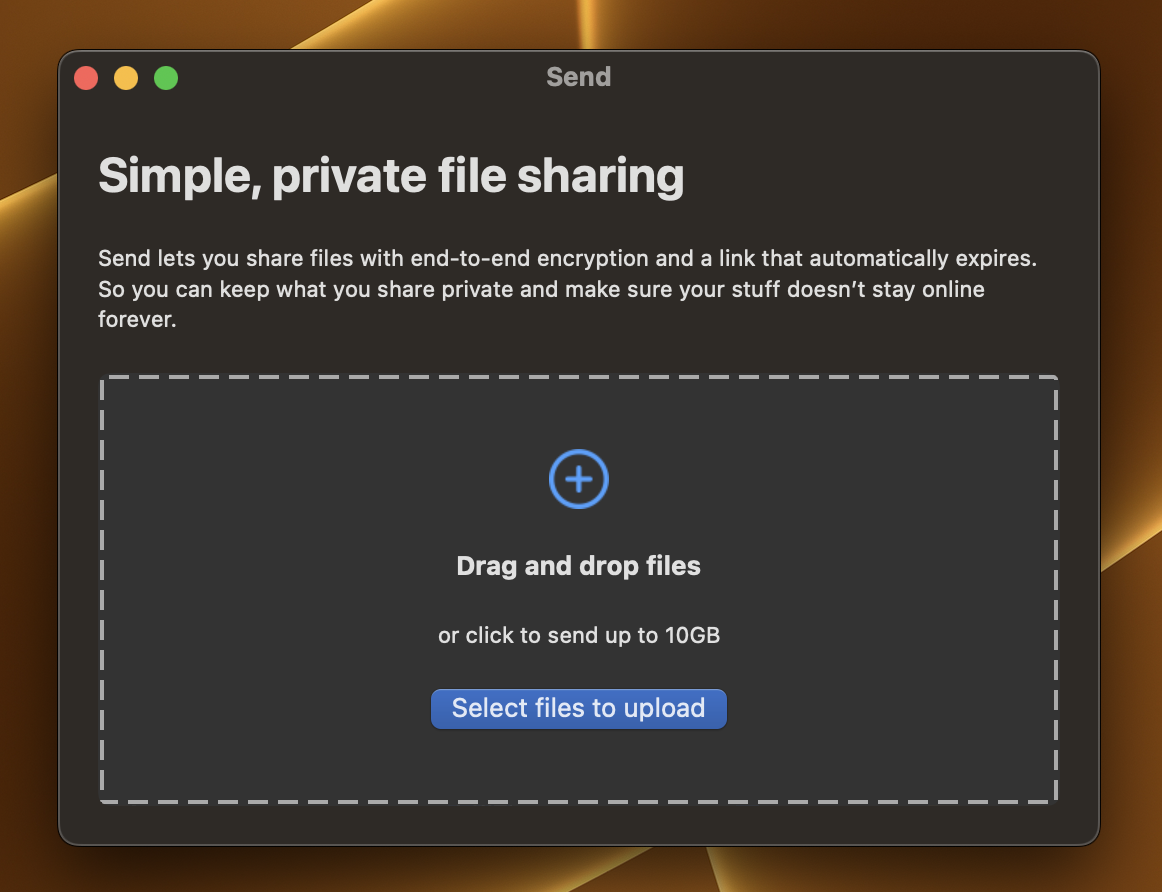
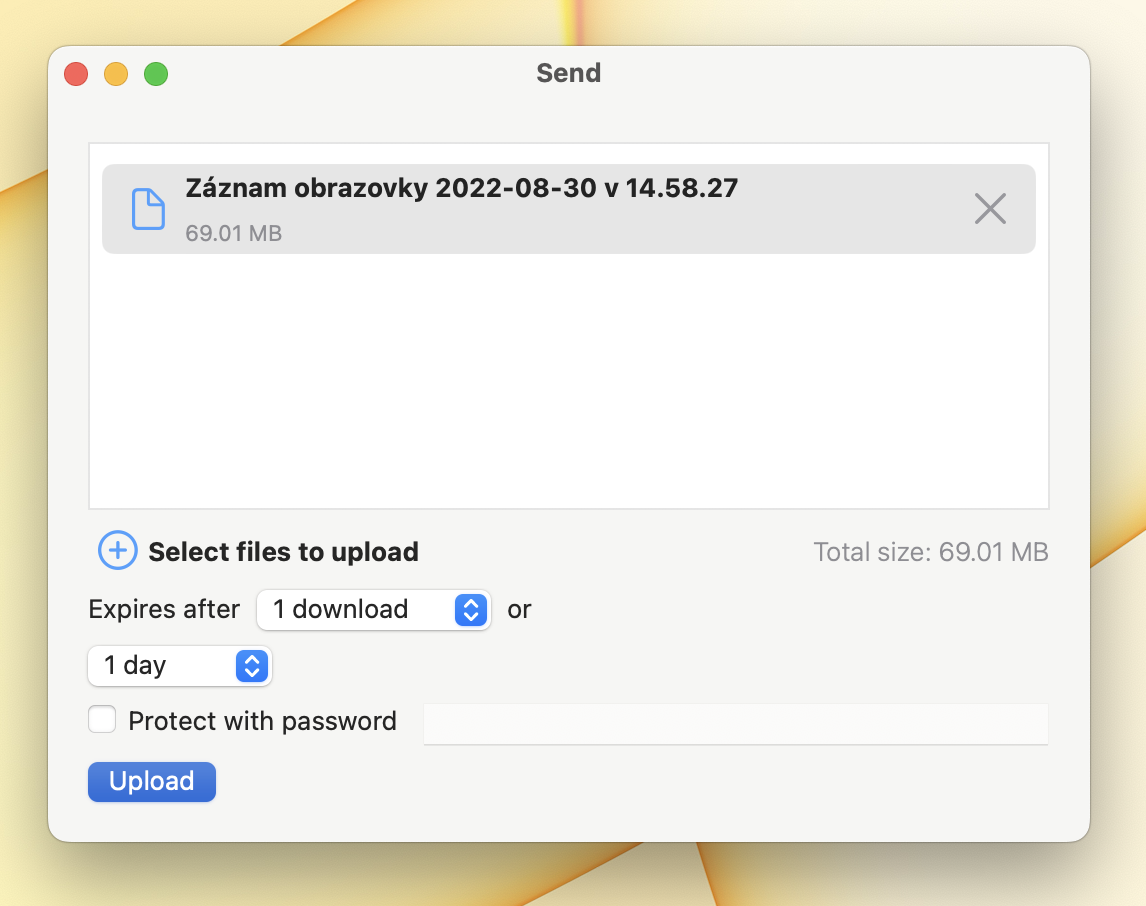
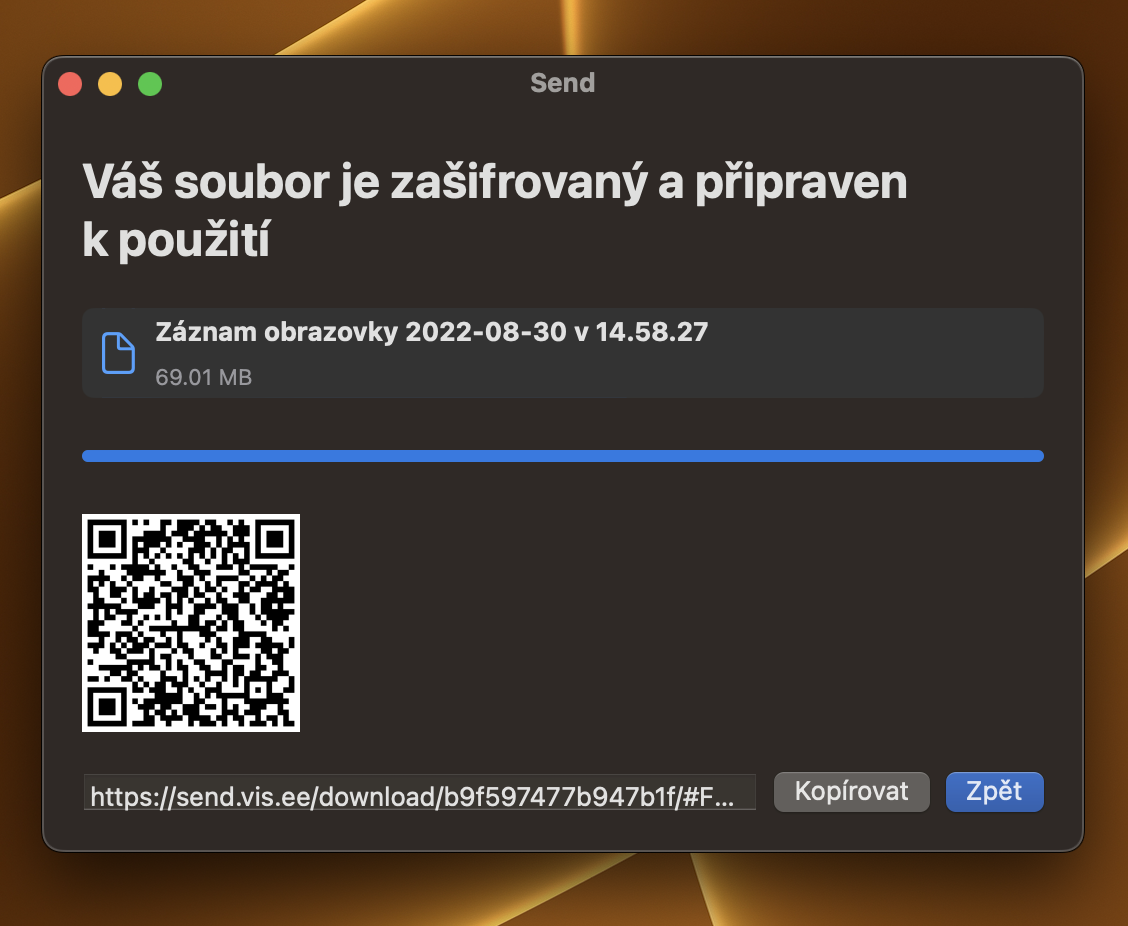
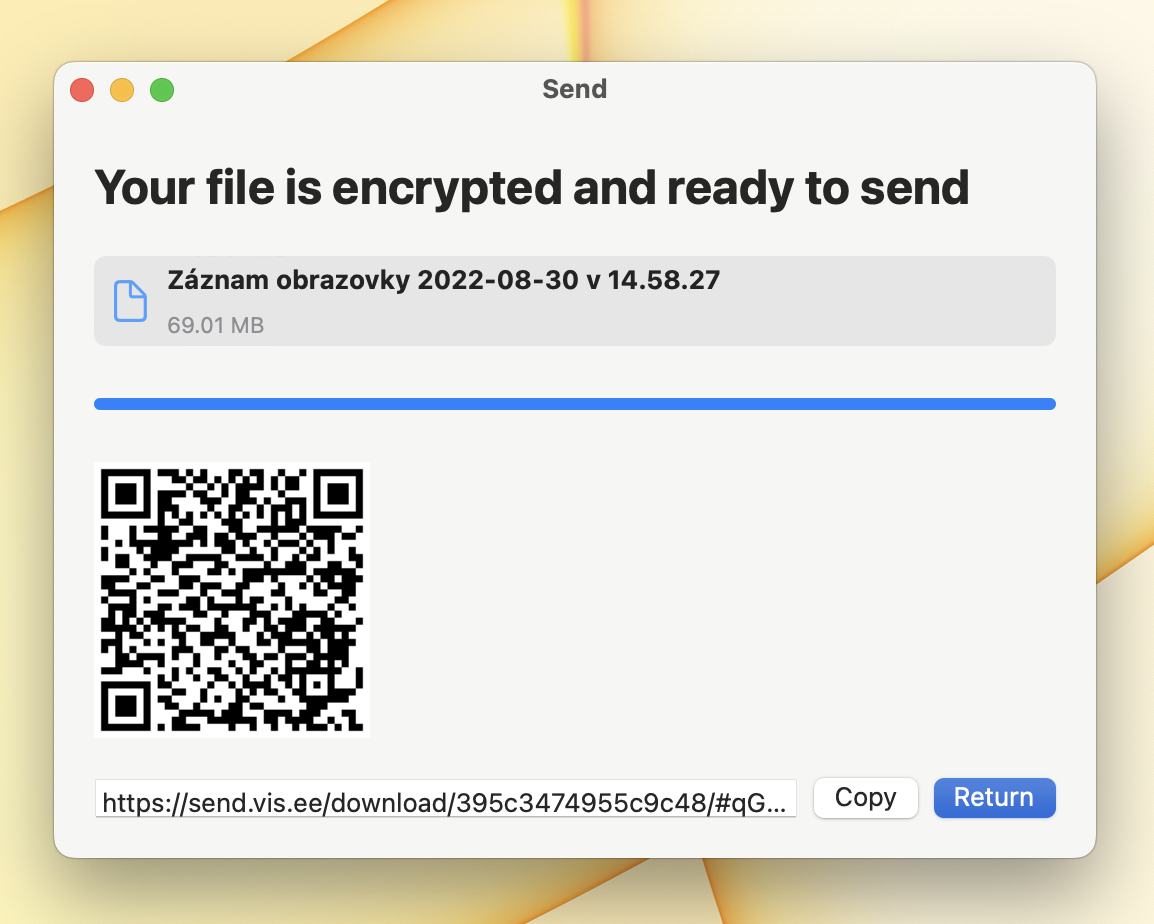
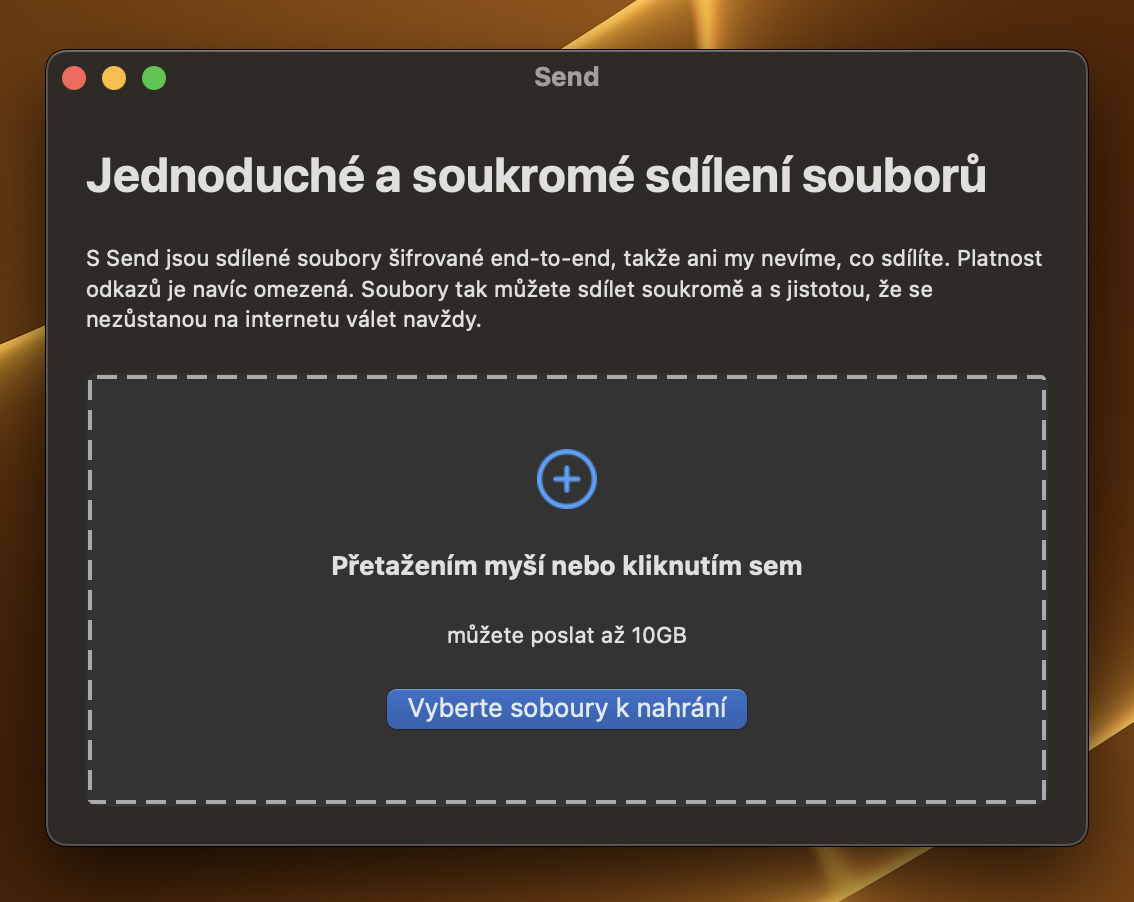
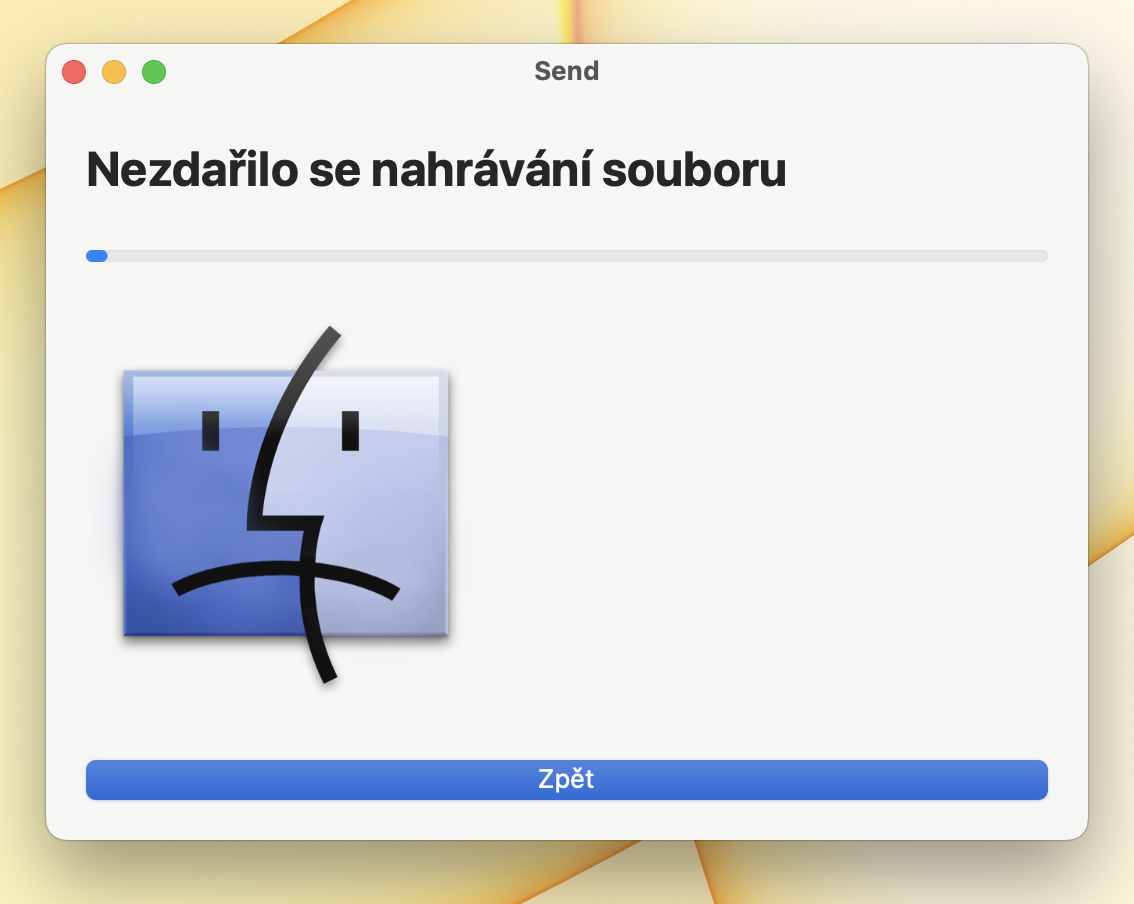
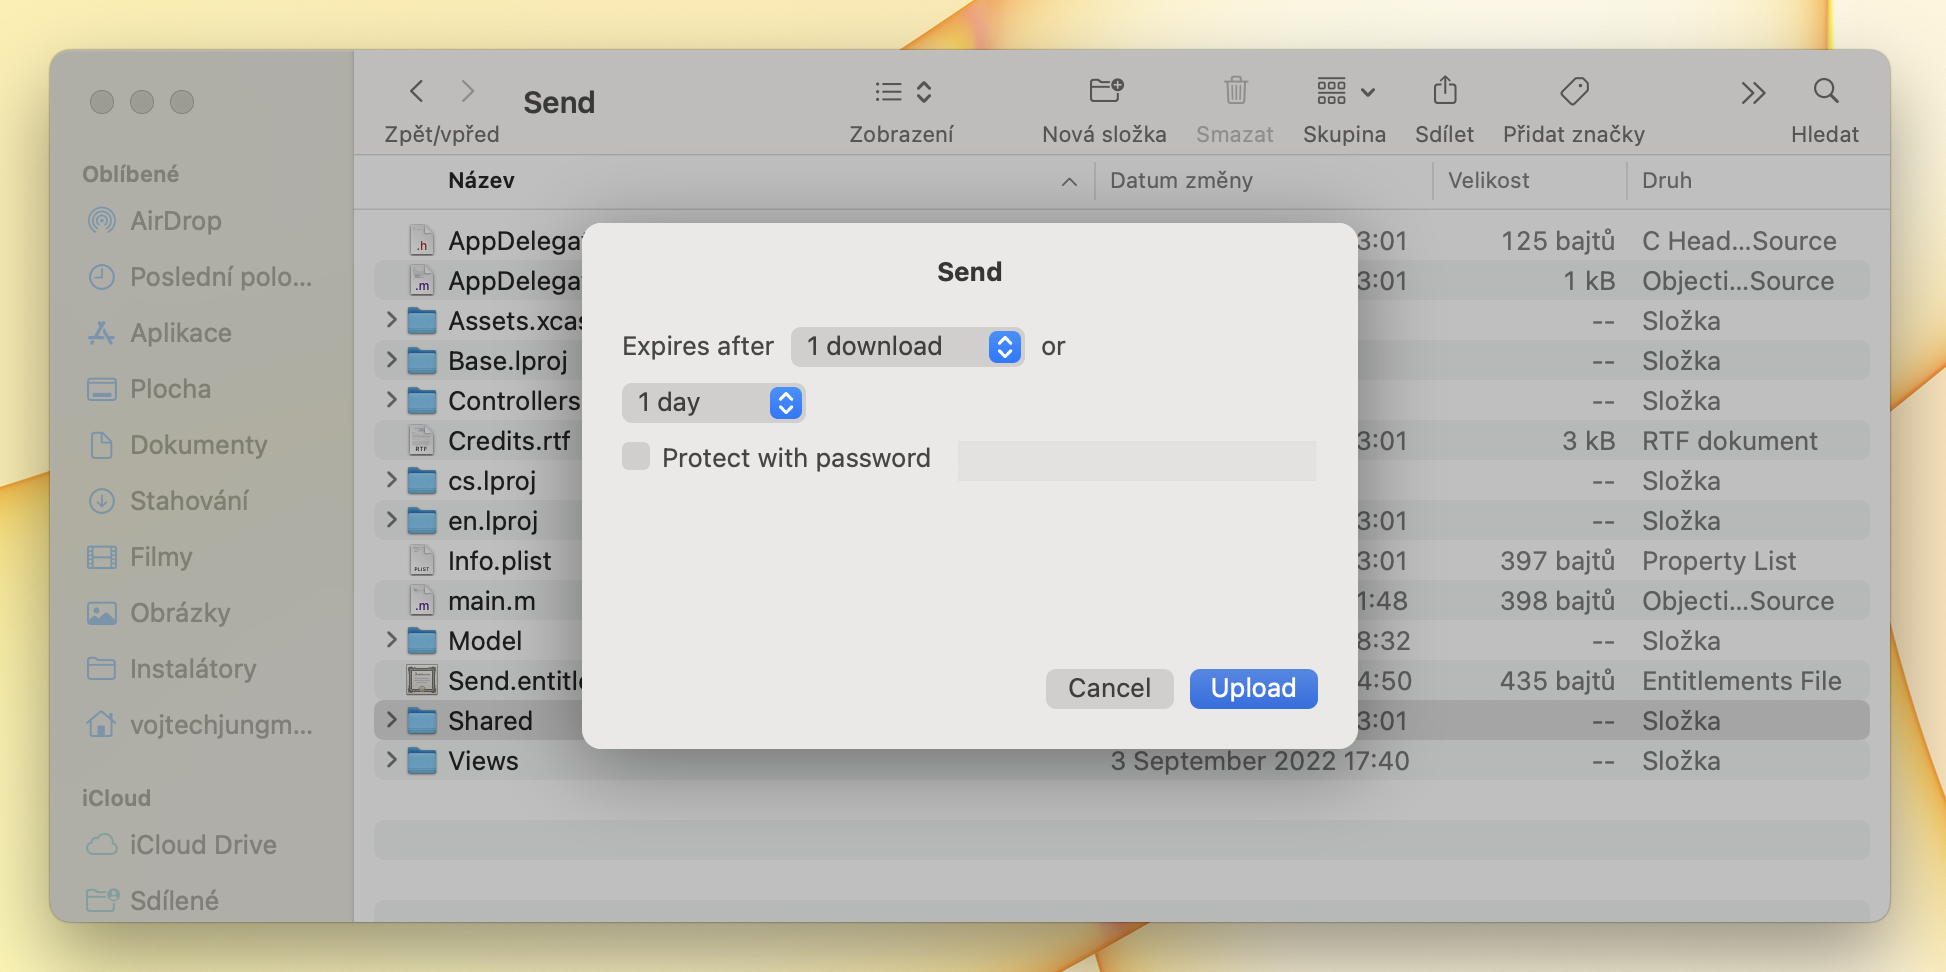
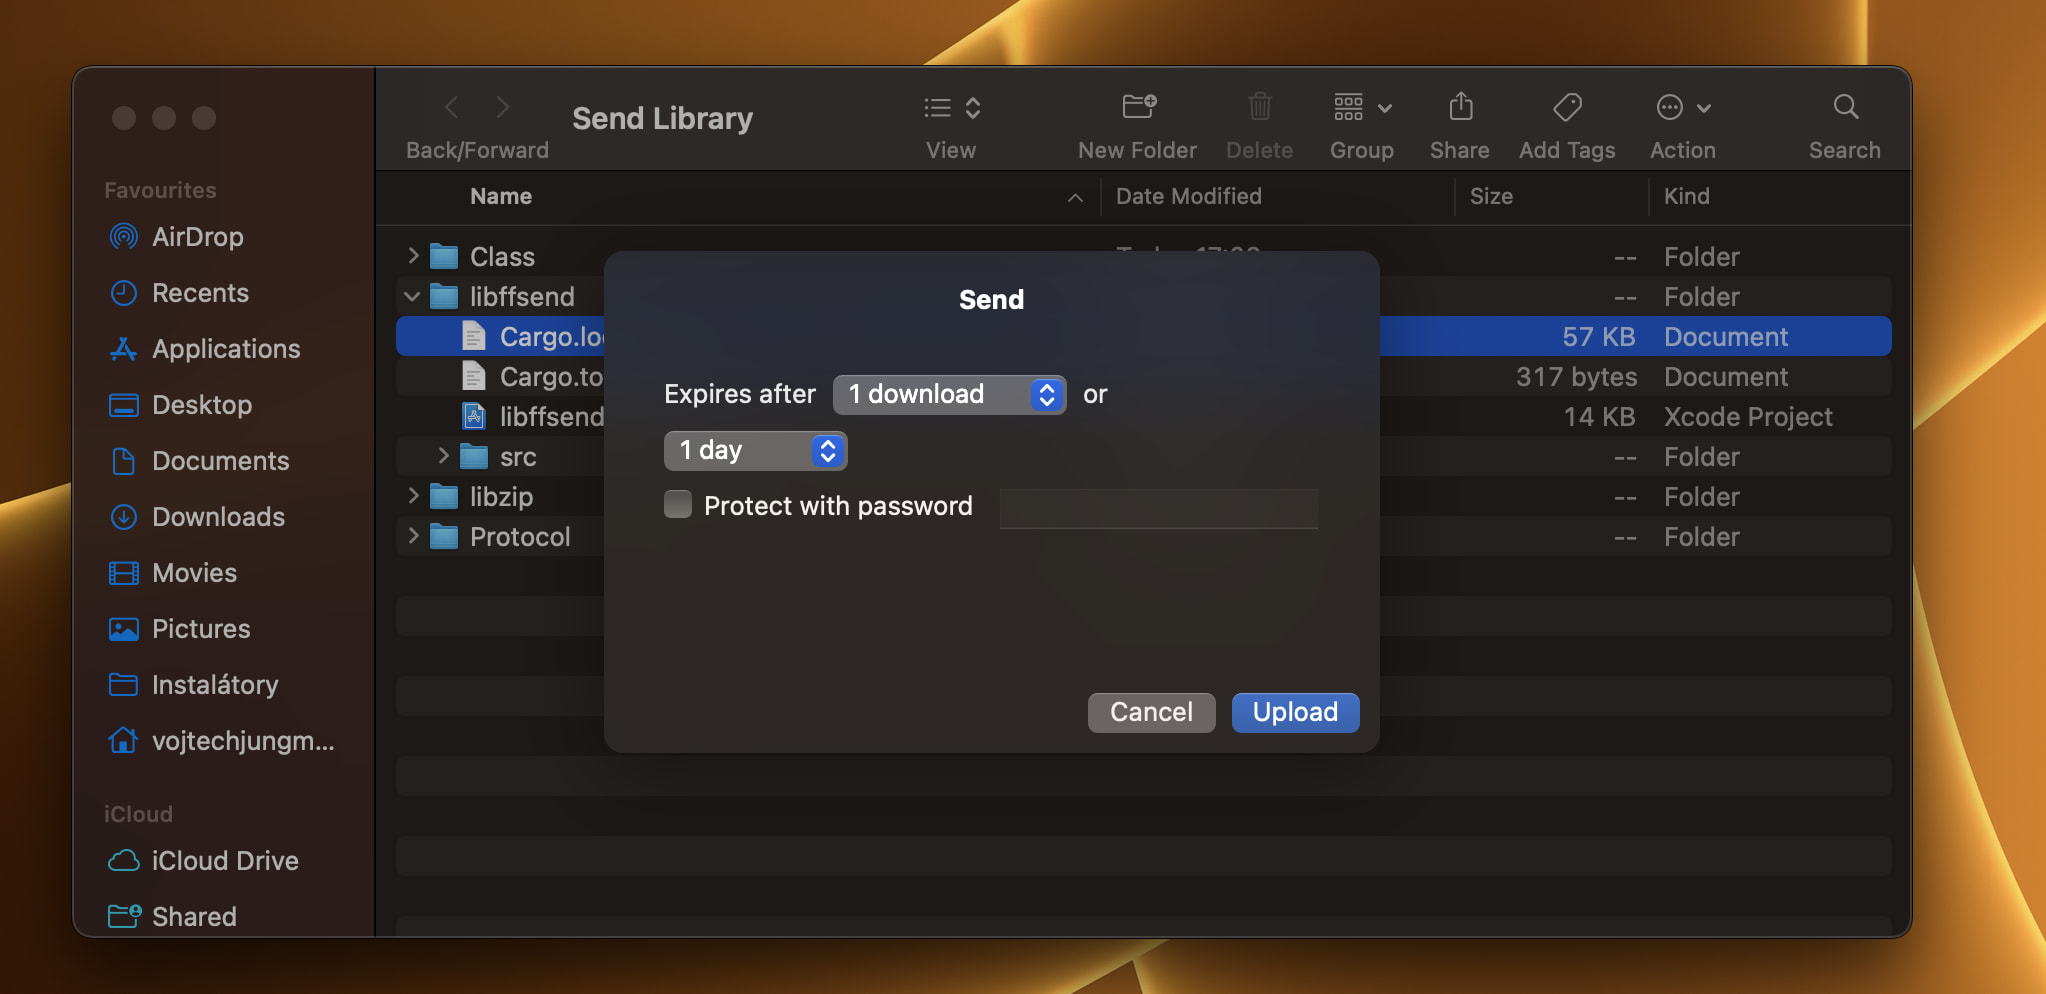
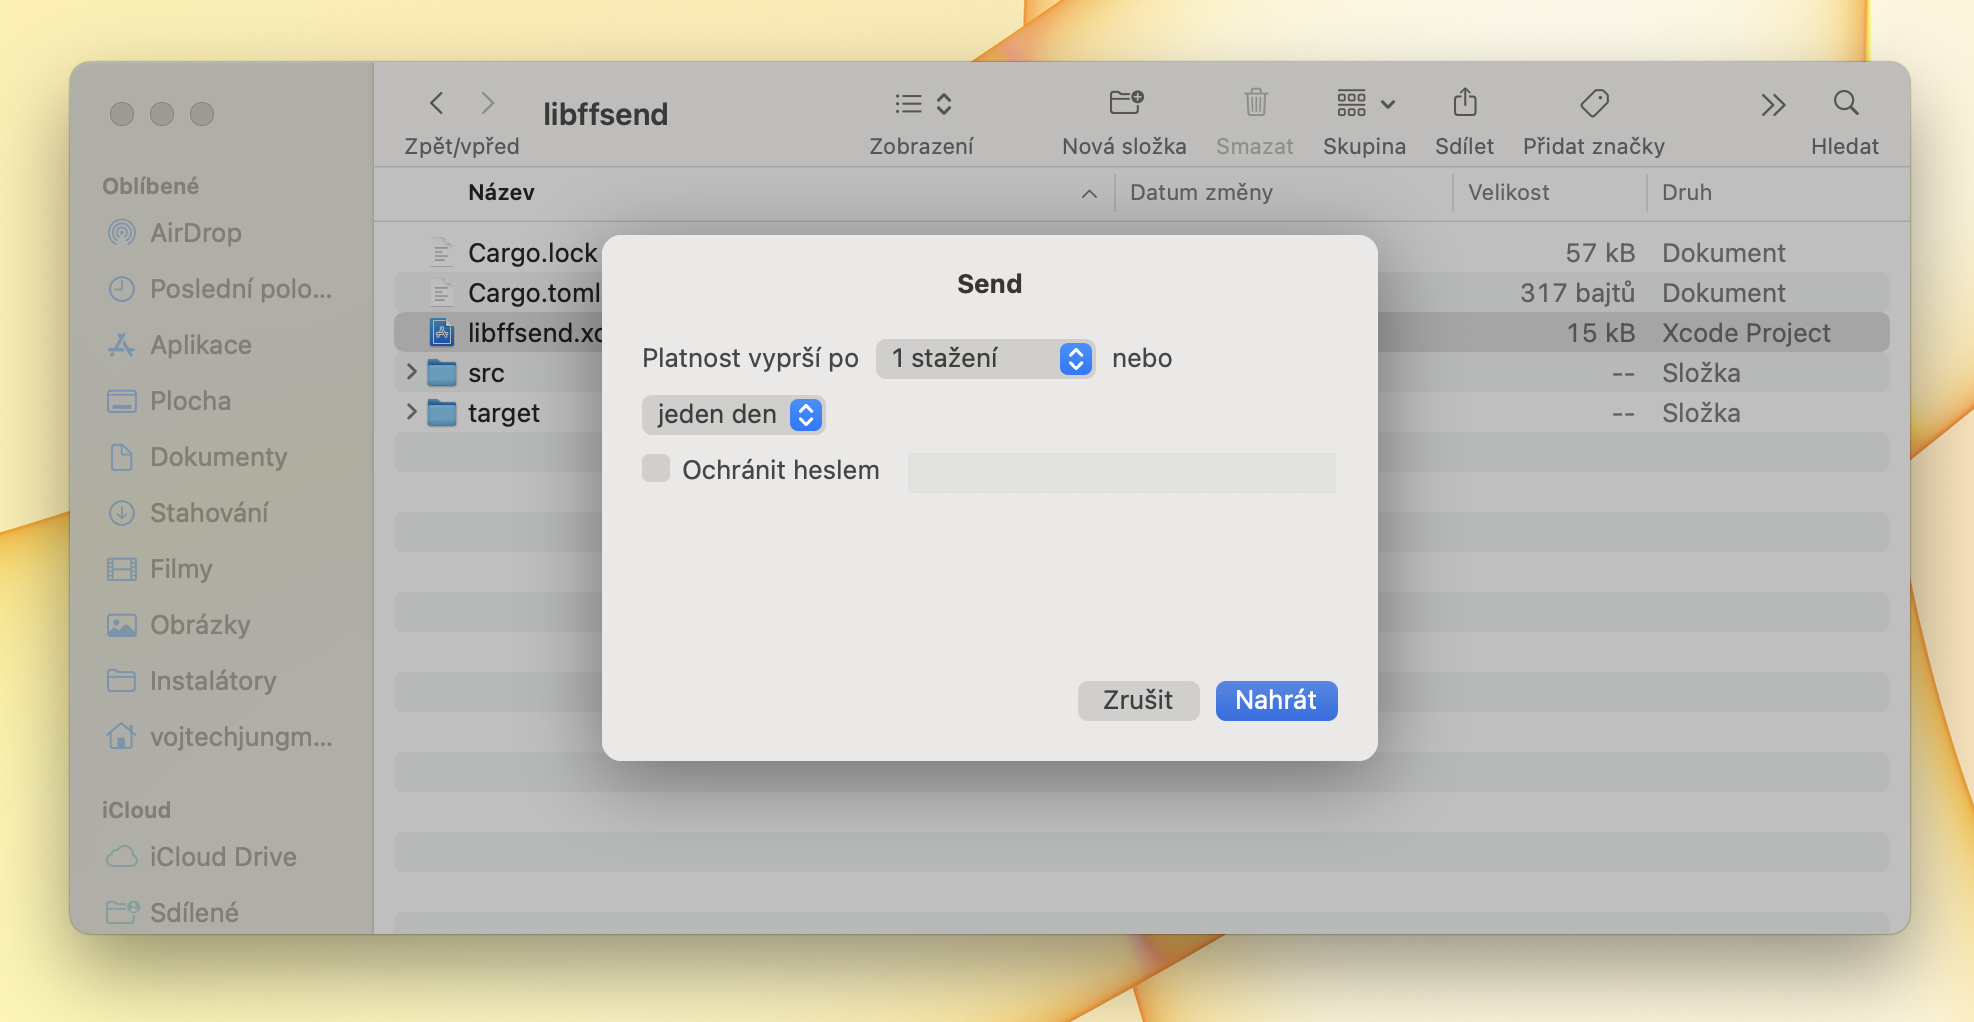
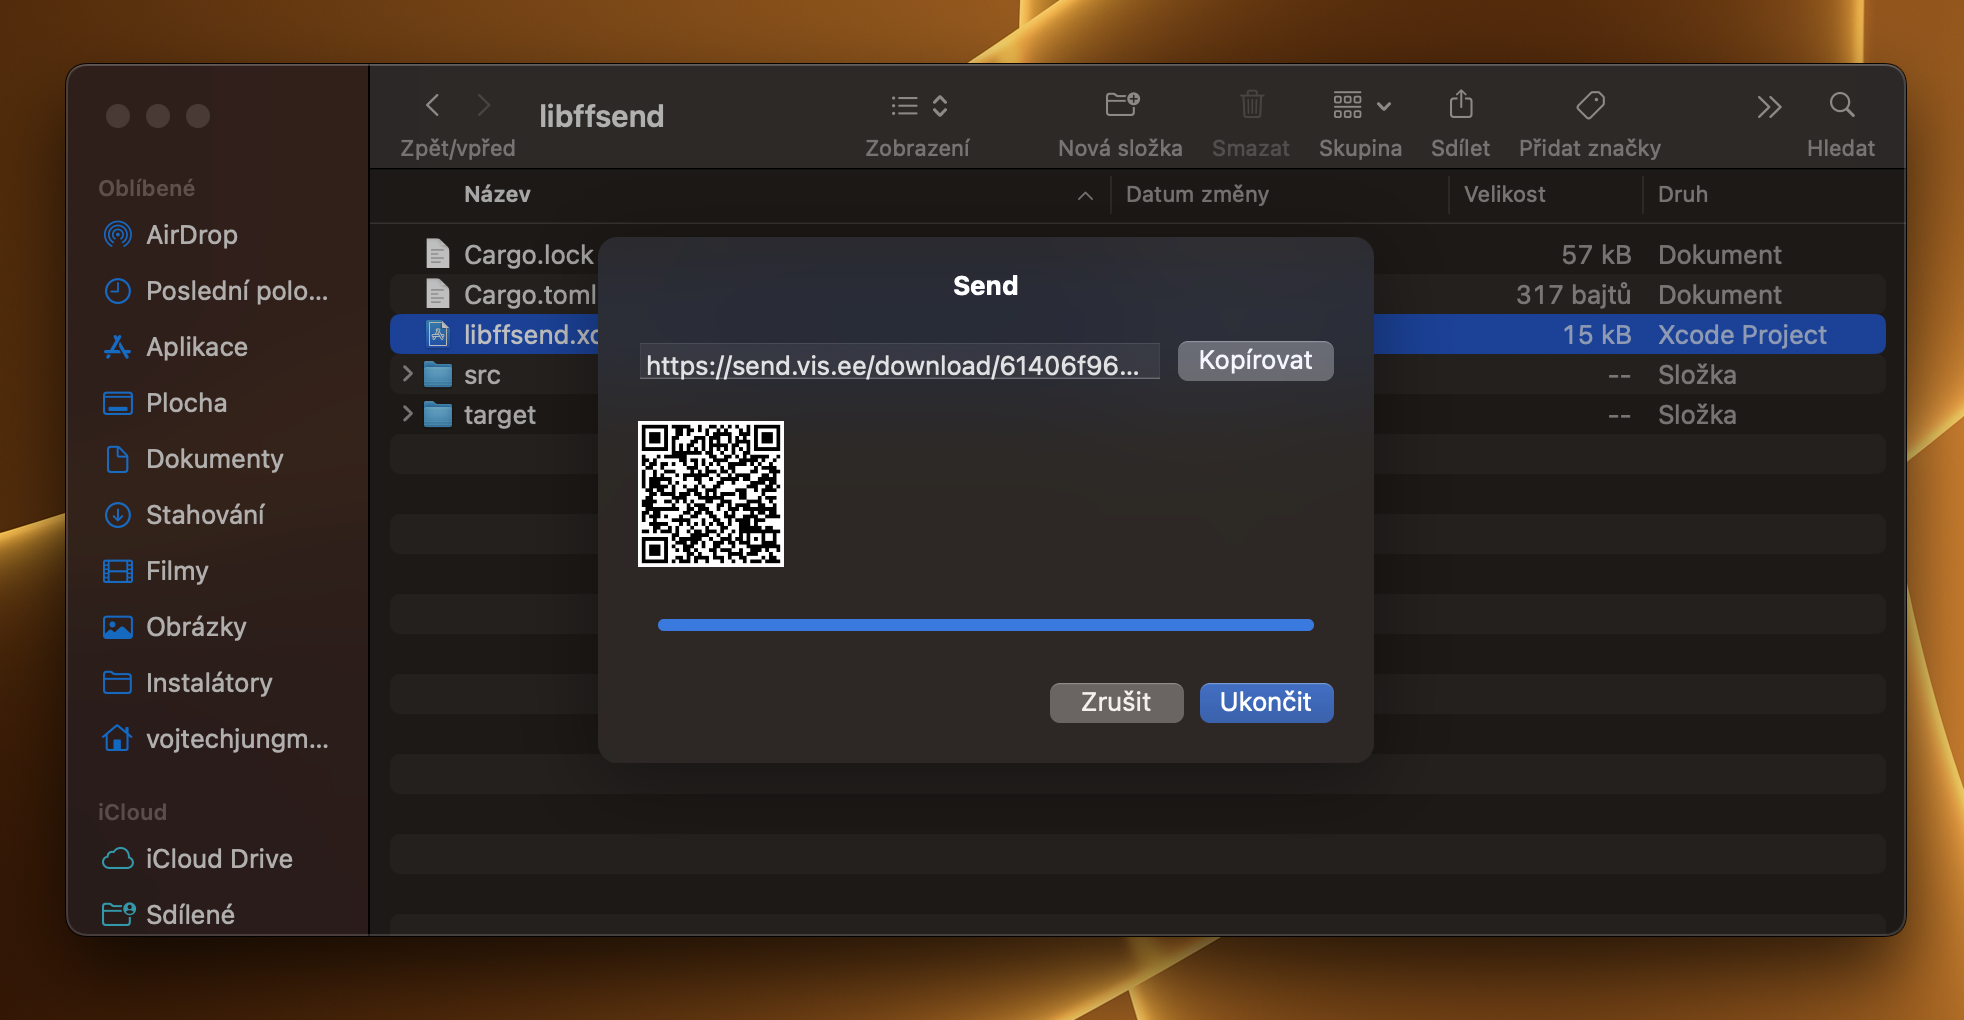
    Send is a native macOS client for Firefox Send services directly based on a fast and secure Rust library with first class support for uploading folders and large files.

    👏 Dependencies

    📙 Multilingual

    • Czech 🇨🇿
    • English 🇬🇧🇺🇸

    ⚙️ Settings

    Available Instance Configurations

    Setting send.vis.ee (default) upload.nolog.cz
    Send URL https://send.vis.ee https://upload.nolog.cz/
    Max Download Limit 10 500
    Max Download Duration 4320 minutes (3 days) 10080 minutes (7 days)
    Max File Size 2500 MB (2.5 GB) 5000 MB (5 GB)

    Note: These configurations may be out of date. Please check the respective instance websites for the most current limits and settings.

    🖼️ Gallery

    Send Screenshot 1

    Send Screenshot 2

    Send Screenshot 3

    Send Screenshot 4

    Send Screenshot 5

    Send Screenshot 6

    Send Share Screenshot 1

    Send Share Screenshot 2

    Send Share Screenshot 3

    Send Share Screenshot 4

    🎥 Video

    Send.Demo.mp4

    📋 Requirments

    • Xcode 12
    • Rust 1.56.1 with both x64 and arm64 targets

    🛠️ How to build

    • git clone https://github.com/EETagent/Send.git
    • cd Send
    • xcodebuild -scheme Send -configuration Release -derivedDataPath build -disableAutomaticPackageResolution CODE_SIGN_IDENTITY=-
    Visit original content creator repository https://github.com/EETagent/Send
  • VGA-EEPROM-Image-Display

    VGA Monitor Image Display Circuit Using EEPROM

    This project is inspired by Ben Eater’s VGA display project, where the goal is to build a circuit that generates the correct timing of sync signals for a VGA monitor to display an image stored on an EEPROM. While Ben Eater’s version displays a single 100×75 pixel image with a 64-color palette, my version introduces significant upgrades. These include support for two images that can be controlled both asynchronously and synchronously, and an increase in color depth from 64 colors to 256 colors. This is achieved by fully utilizing the 8 bits of the AT28C256 EEPROM instead of the 6 bits used in the original version.

    Dual Image Display

    Upgrading the project to support two images required only minor adjustments, as the full address space of the AT28C256 EEPROM was not used in the original project. The EEPROM has 15 address pins (A0-A14), but in the original video, the most significant address pin, A14, was left unused. By utilizing this pin, the EEPROM was effectively divided in half, with each half storing a separate image. Controlling which image is displayed is simple: toggling the A14 signal between logic 0 and logic 1 selects one of the two images. This toggle can be controlled automatically using a fixed timing mechanism or manually by the user.

    Dual Image Display Example

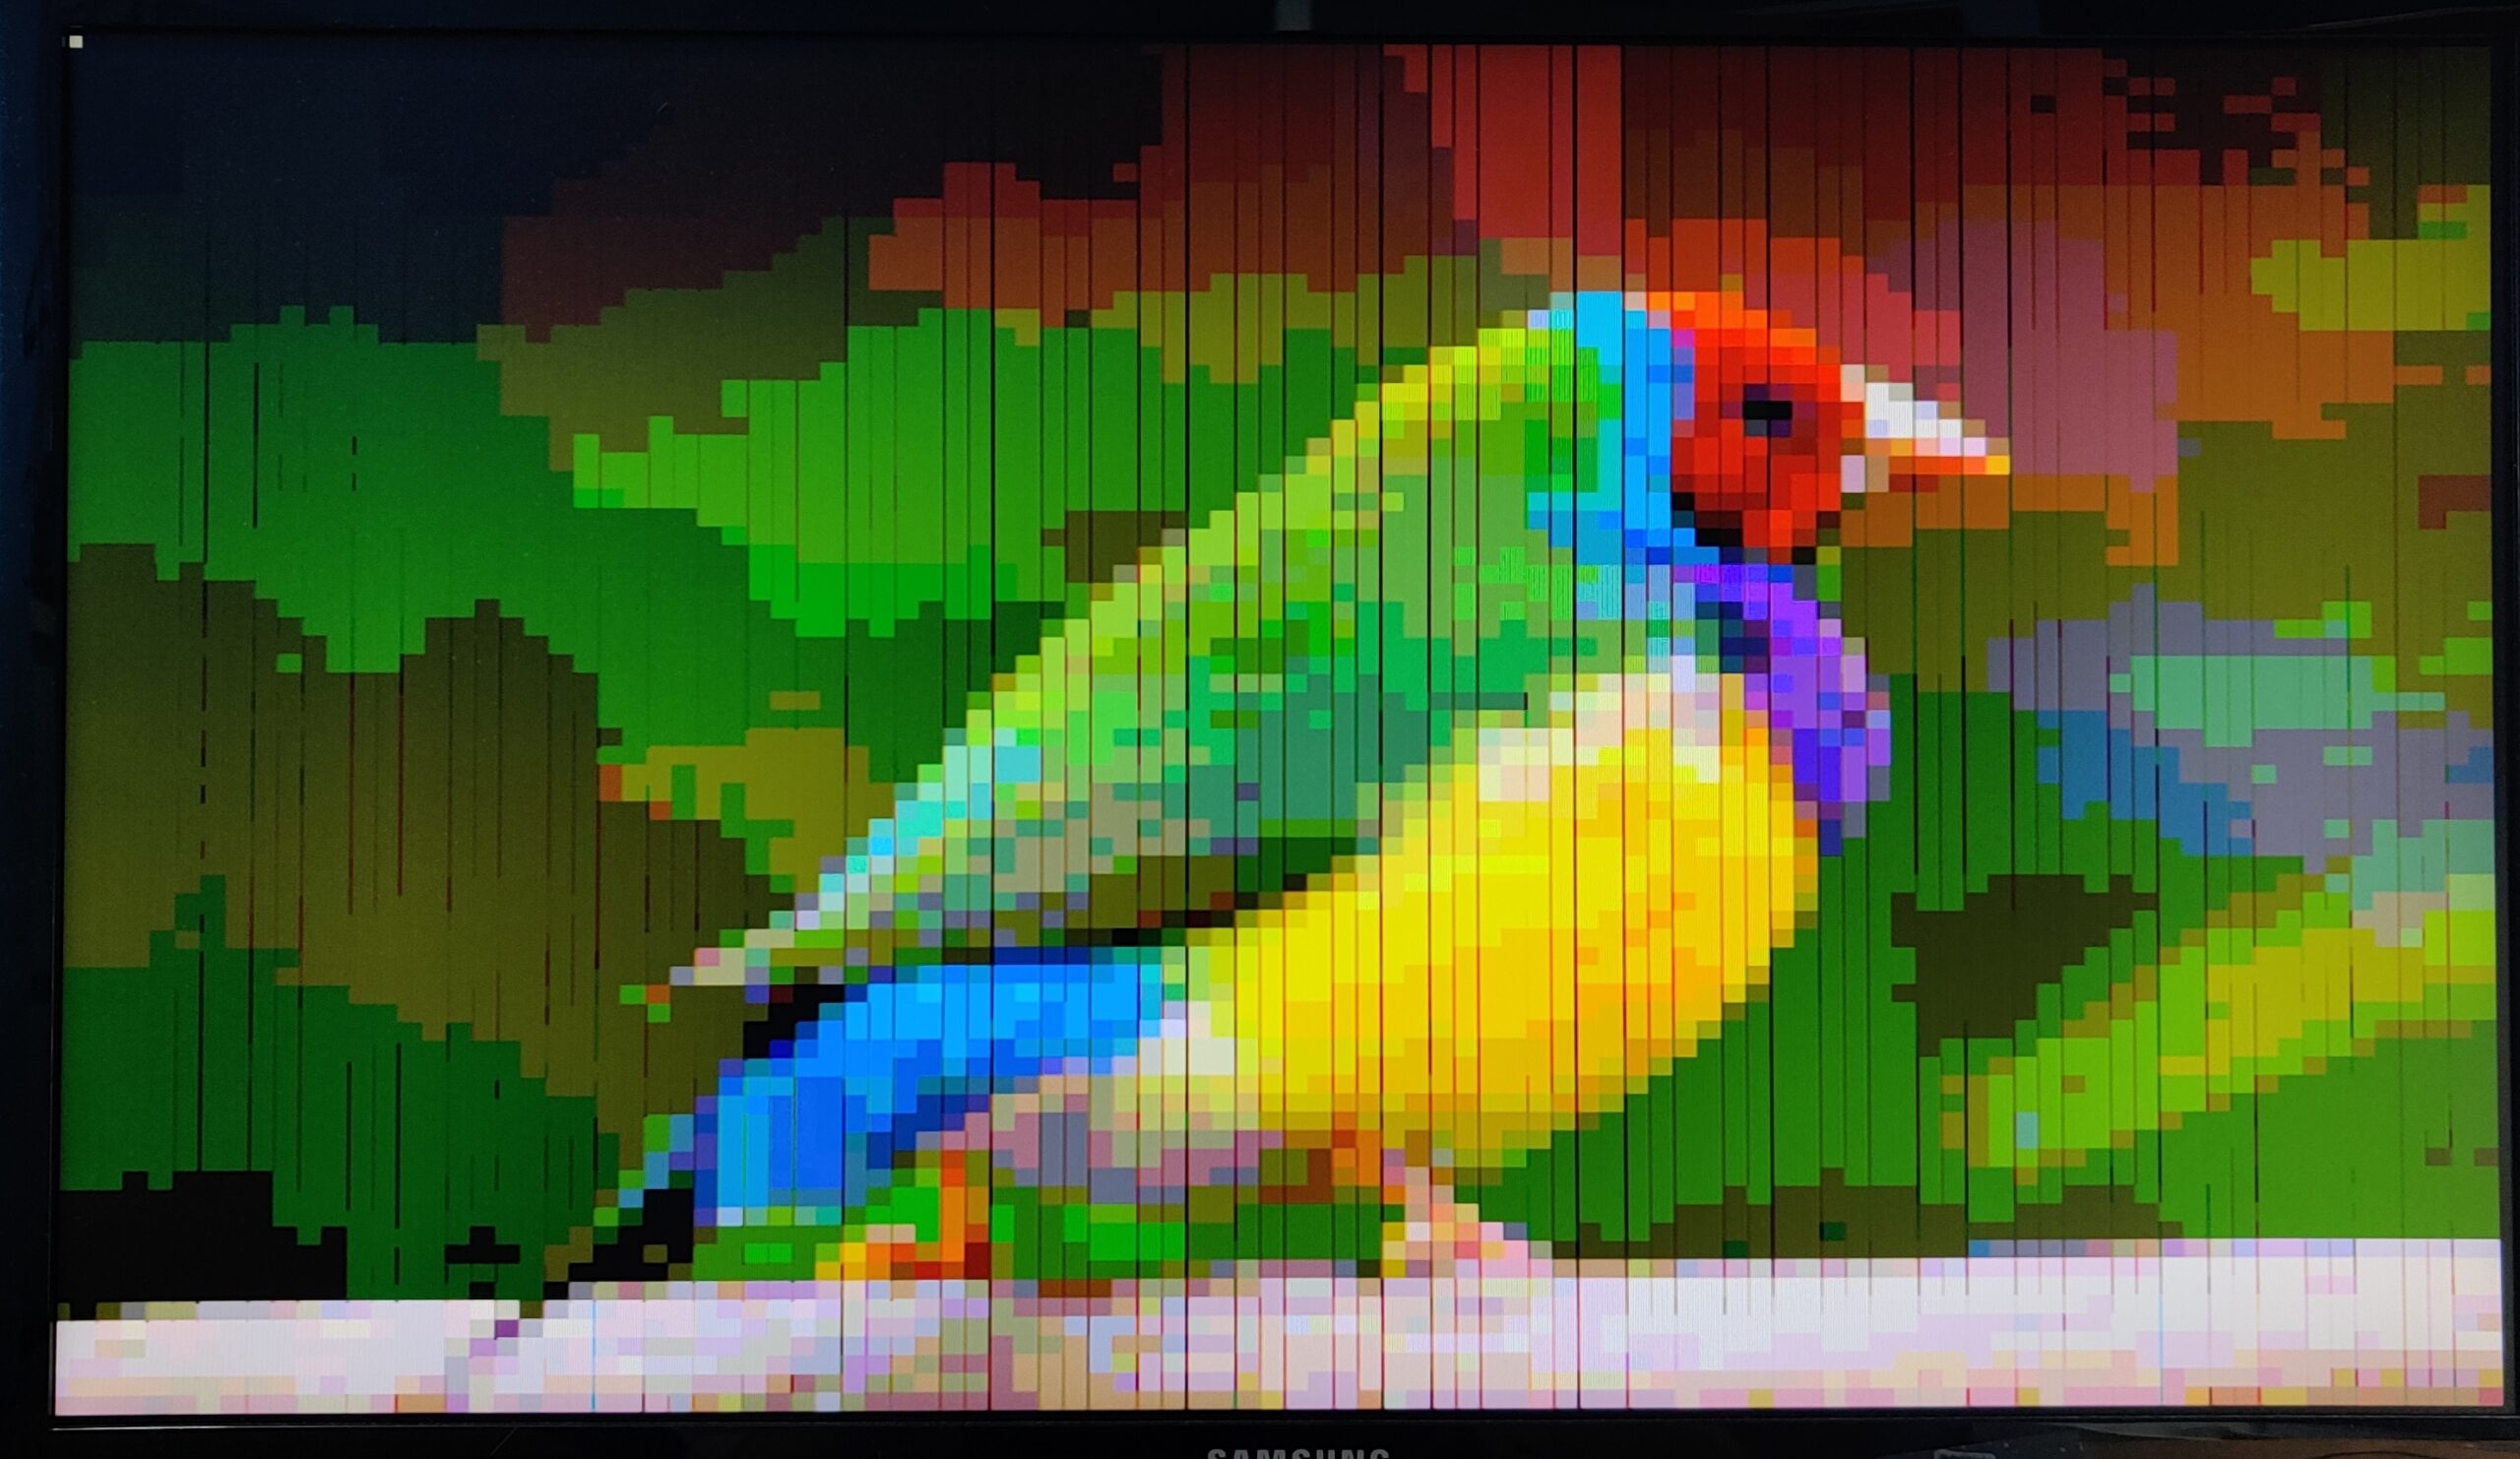
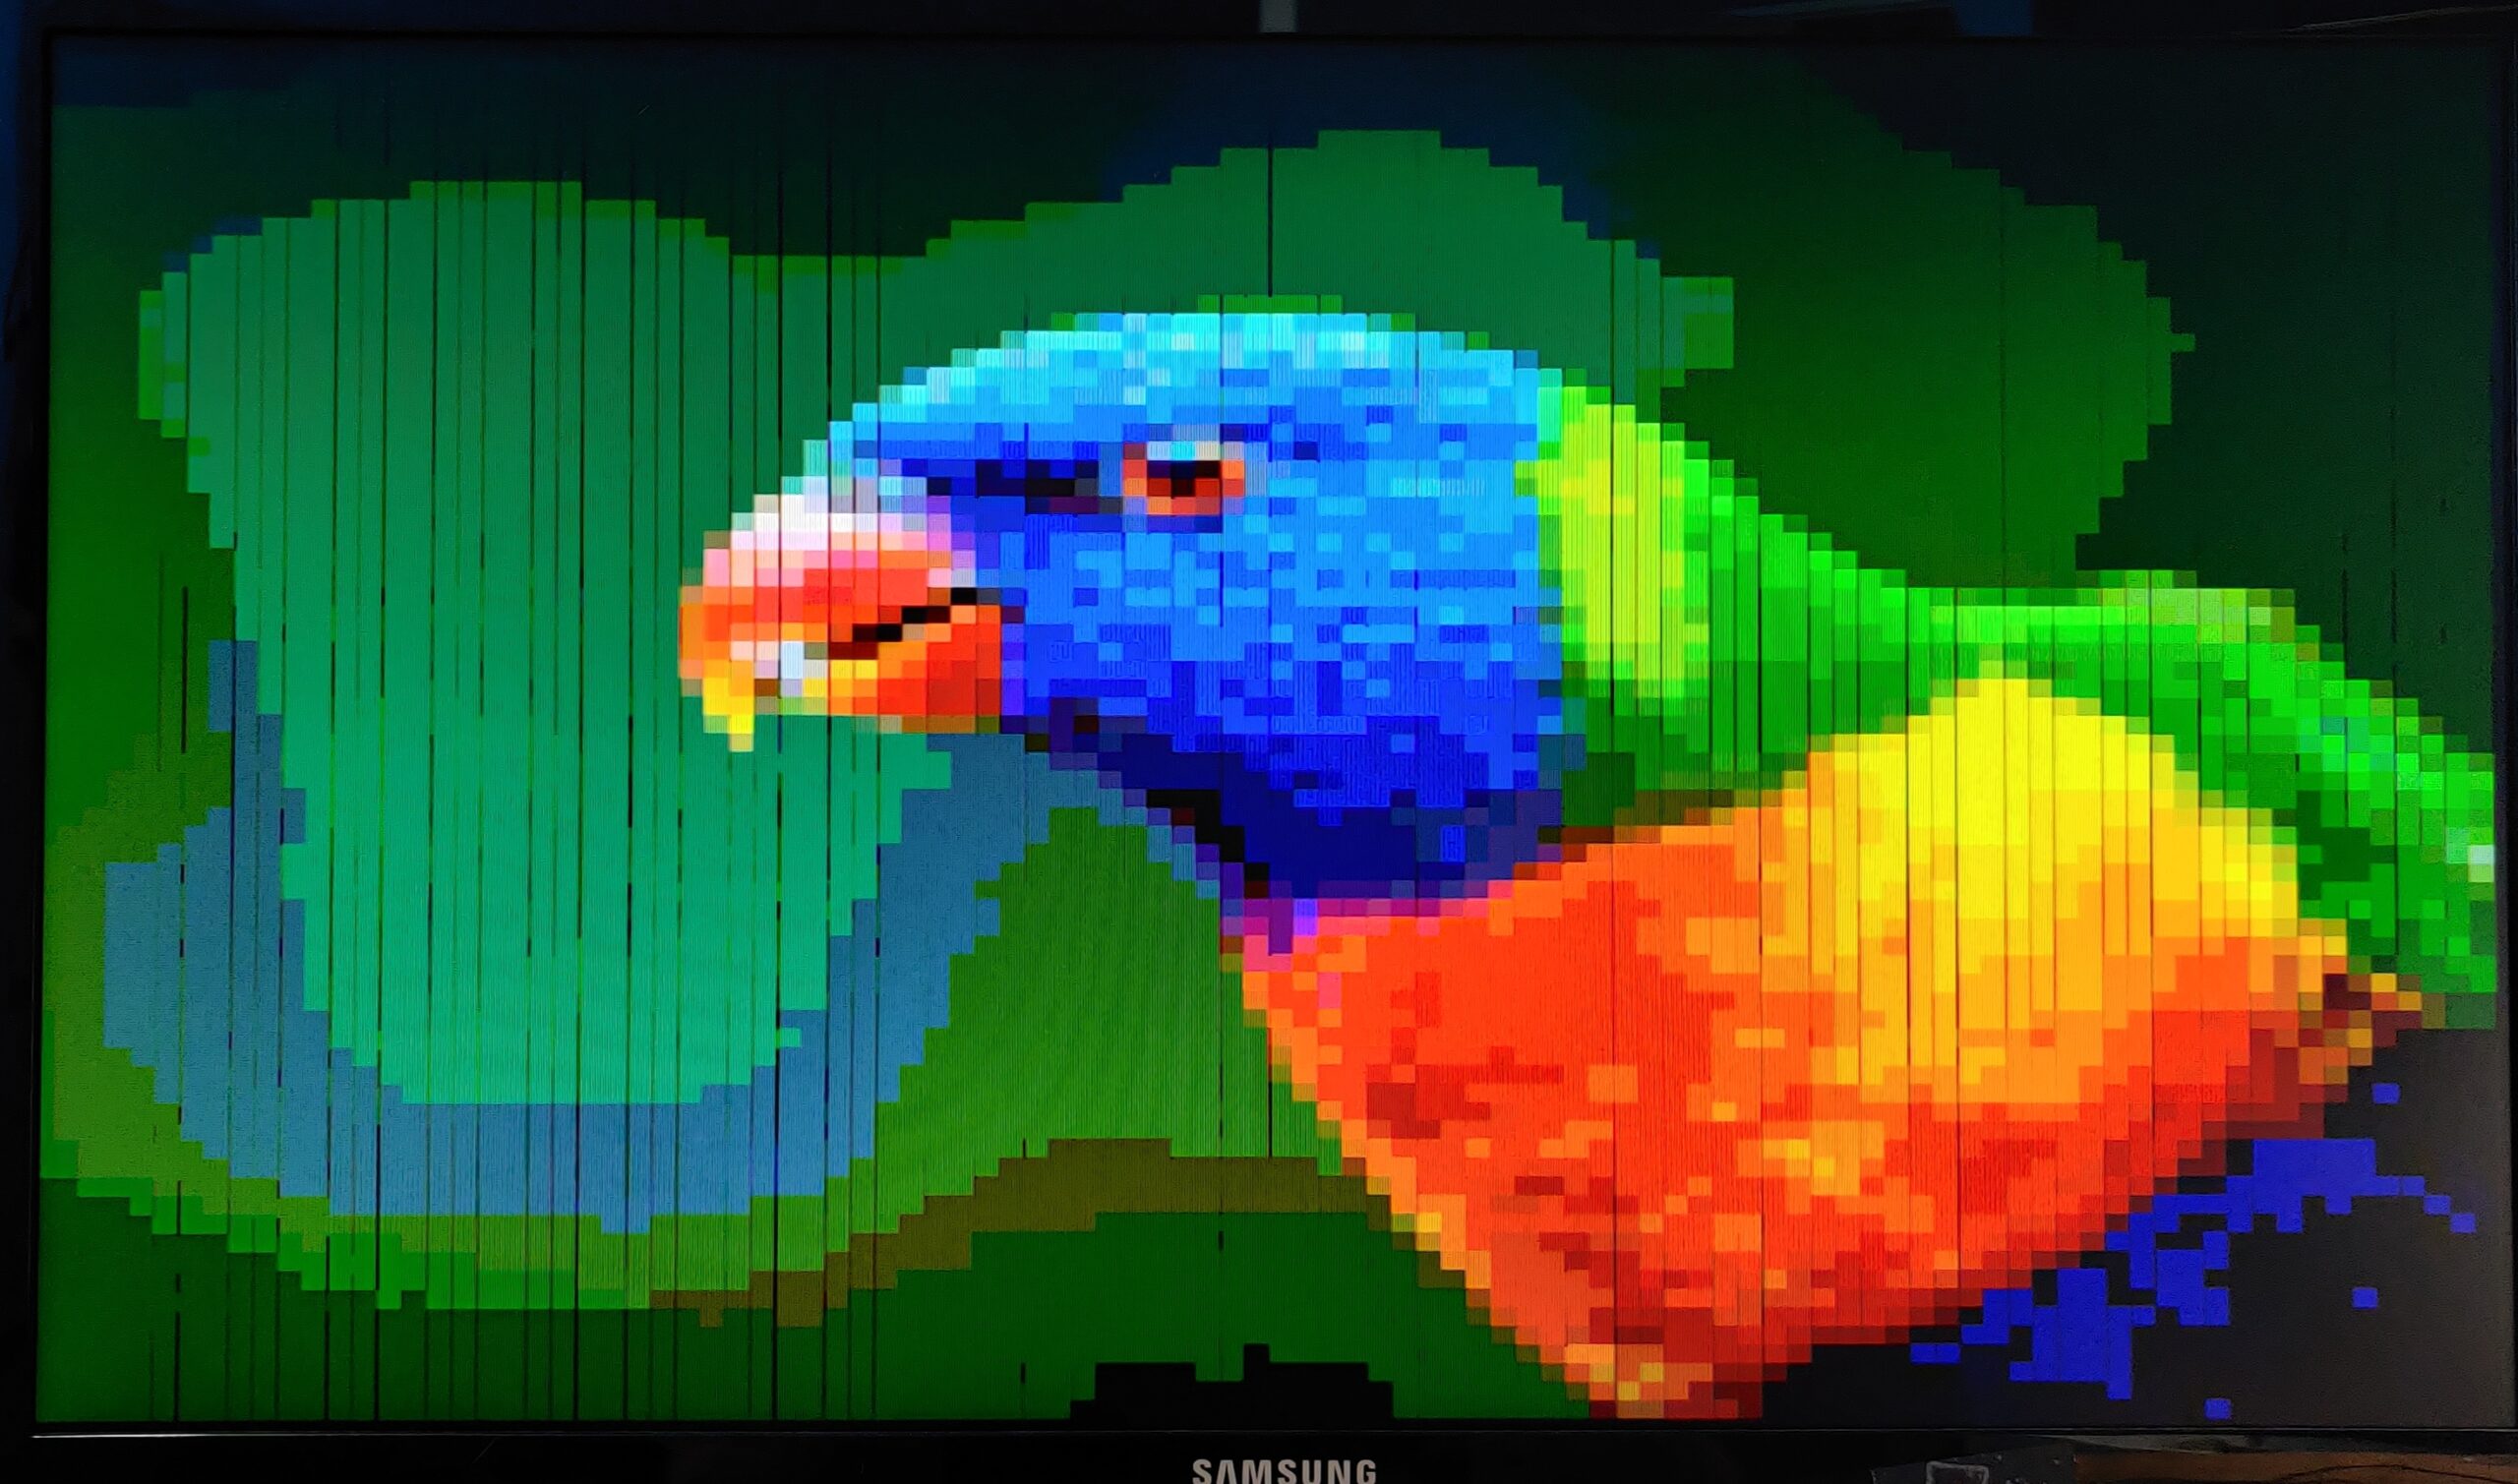
    Result of the Finch and Bird Images

    Here are photos showing the result of the Finch and Bird images displayed on the VGA monitor. These photos demonstrate how the images look after being processed and stored on the EEPROM.

    Finch Image Result Bird Image Result

    Image Control Mechanism

    The control mechanism for switching between images offers three modes, selected via sliding switches: astable, monostable, and bistable. In the astable mode, the image changes at regular intervals using an adjustable clock built with a 555 timer chip and a potentiometer to vary the frequency. The monostable mode uses a set resistor and capacitor value to switch images based on a fixed timing. Finally, the bistable mode allows the user to manually change the displayed image by pressing a button that toggles between the two states.

    Upgrading the Color Palette to 256 Colors

    Ben Eater’s original project used 6 bits for color, allowing for a palette of 64 colors. Two bits were used for each of the three color channels: red, green, and blue. However, since the EEPROM has 8 bits, I expanded the color palette to 256 colors (2^8 = 256) by using all available bits. The 8 bits are organized as follows:

    • The least significant 3 bits (bits 0-2) represent the red channel.
    • The next 3 bits (bits 3-5) represent the green channel.
    • The most significant 2 bits (bits 6-7) represent the blue channel.

    This expanded palette allows for greater color depth while maintaining the same method of generating the required voltage levels via voltage dividers. These dividers divide the voltage signal into two or three equal parts, depending on the channel.

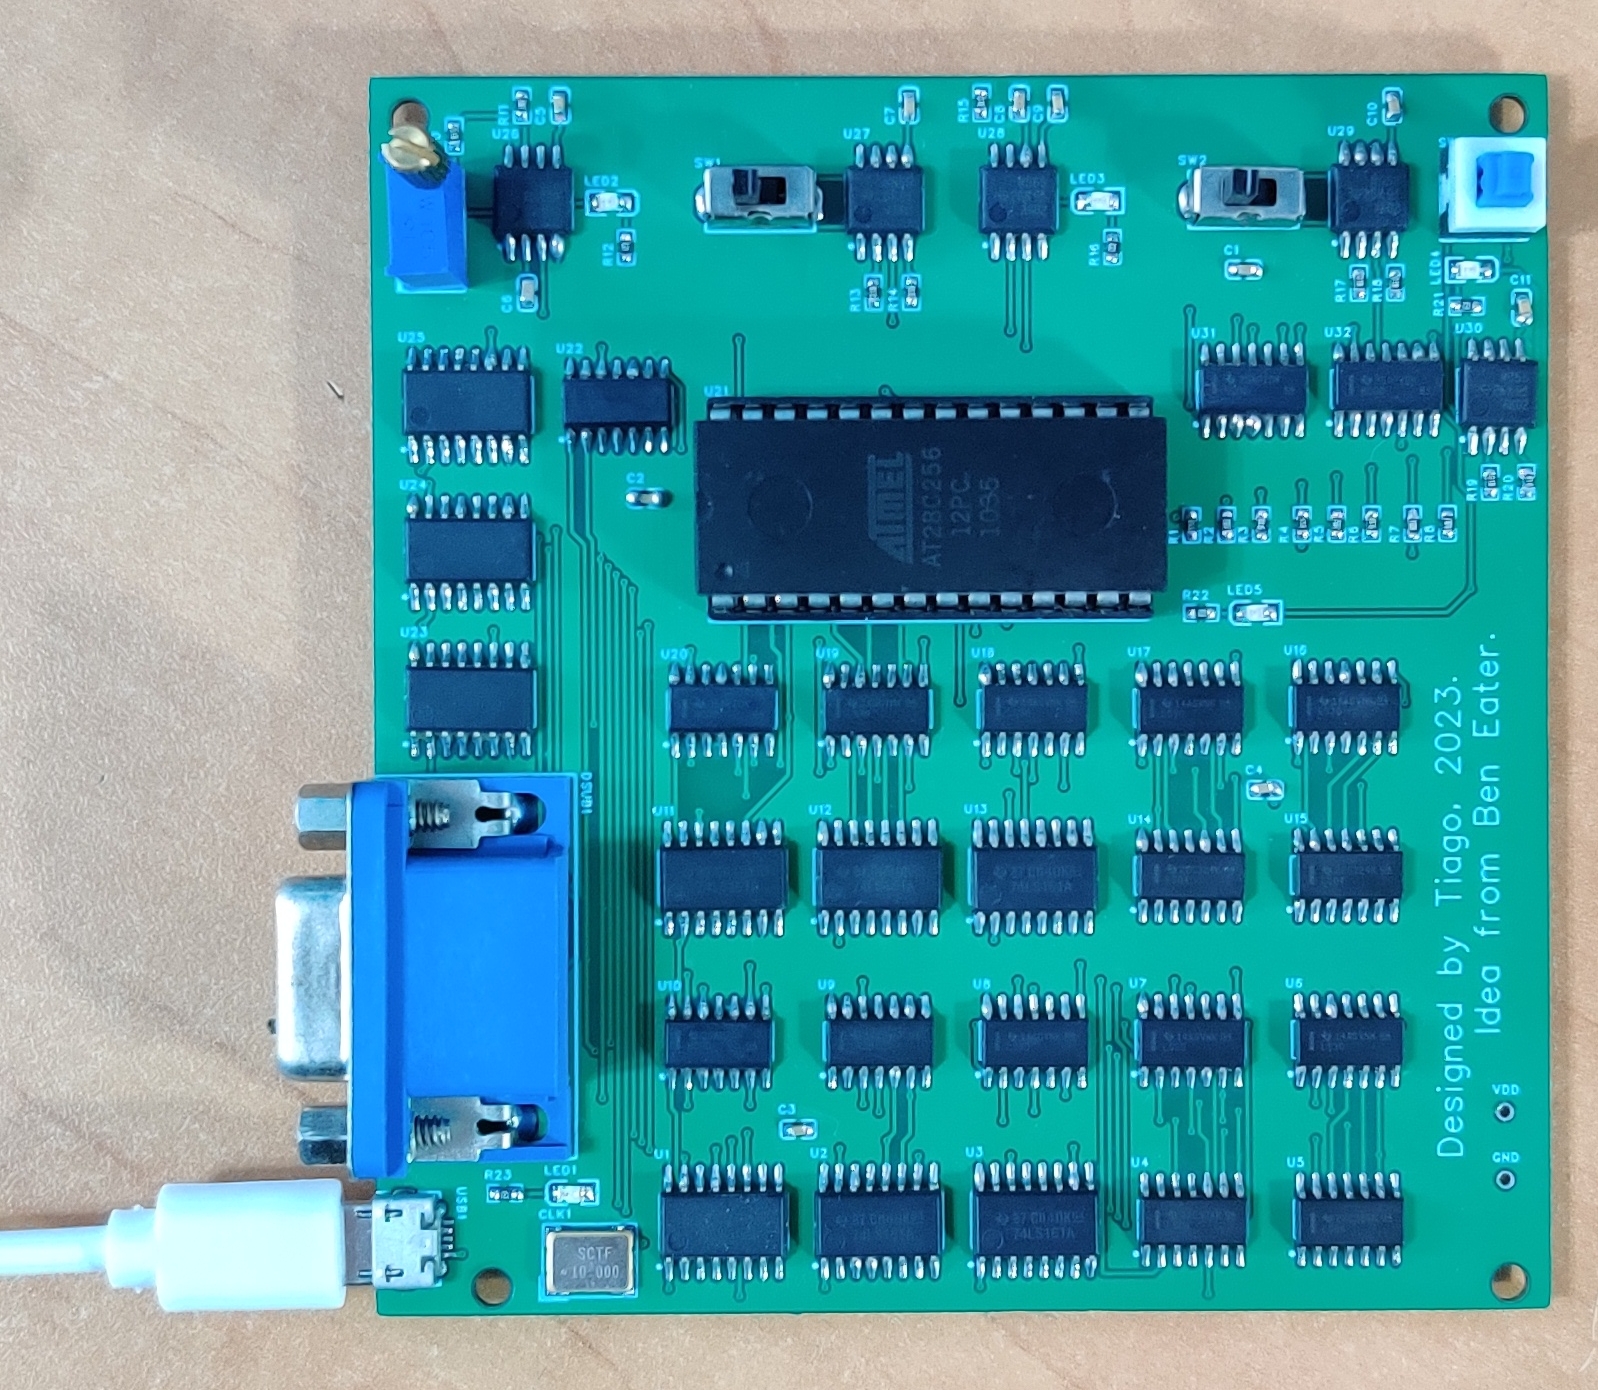
    Building the Project

    The project was initially prototyped on a breadboard to test the circuit. After the design was confirmed to be working, I transitioned to designing and printing a custom PCB using an online service. This made the circuit more reliable and compact compared to the breadboard version.

    PCB Design Photo of PCB

    Generating and Uploading Images to the EEPROM

    In Ben Eater’s video, Photoshop was used to convert images to the defined 64-color palette, and Python was then used to convert the image to a .bin file, which was uploaded to the EEPROM using a programmer. Since I did not have access to Photoshop or an EEPROM programmer, I created a Python script to convert each pixel of a 100×75 image to one of the 256 possible values, and then used an Arduino Mega to upload the image to the EEPROM. The Arduino Mega was chosen due to its higher memory capacity, allowing one image to be saved and loaded into the EEPROM at a time. This process has some limitations: the Mega only has enough memory to handle one image at a time, and it takes approximately 1 minute and 20 seconds to program a single image.

    Future Improvements

    There are several future enhancements planned for this project:

    1. Increasing Resolution: A higher resolution image could be displayed, but this would require faster hardware and a more efficient EEPROM to handle the increased data.
    2. Improved Circuit Design: Adding bypass capacitors as close as possible to each component on the PCB will help mitigate noise and improve signal integrity.
    3. Better EEPROM Quality: Purchasing EEPROM chips from reputable sources may help reduce screen artifacts and improve the quality of the displayed image.
    4. Improved Color Conversion Algorithm: The current algorithm used to convert pixel colors to a 256-color palette is relatively simple, based on dividing the color range into equal parts. A more sophisticated algorithm could be developed to better map image colors to the 256-color space, optimizing the visual output. This would help take fuller advantage of the available color palette.
    5. Faster EEPROM Programming: The speed of EEPROM programming could be improved by using Port Manipulation on the Arduino. This method involves manipulating the microcontroller’s port registers directly, allowing for faster and more efficient control of the I/O pins compared to the higher-level digitalWrite() functions.
    Visit original content creator repository https://github.com/CandeiasV2/VGA-EEPROM-Image-Display
  • standa

    title emoji colorFrom colorTo sdk pinned license
    Stock Analysis Dashboard – *standa*
    📈
    gray
    green
    docker
    false
    mit

    Stock Analysis Dashboard

    Check out the configuration reference at https://huggingface.co/docs/hub/spaces-config-reference

    A live demo can be found at https://huggingface.co/spaces/felmofatiche/standa

    standa – Stock Analysis Dashboard

    Introduction

    Welcome to the Stock Analysis Dashboard, an open-source project designed for interactive stock data visualization and analysis. This dashboard is built using Panel, Cufflinks, and Plotly, providing a dynamic and user-friendly interface for exploring stock market trends and metrics.

    Features

    • Interactive charts and graphs using Plotly and cufflinks
    • Customizable technical analysis charts
    • Historical data comparison
    • Forecasting

    Installation

    To set up the Stock Analysis Dashboard, follow these steps:

    1. Clone the repository:
    git clone https://github.com/fayssalelmofatiche/standa.git
    1. Navigate to the project directory:
    cd standa
    1. Install required packages
    poetry install

    Usage

    To run the dashboard:

    panel serve standa.ipynb --show --autoreload

    Contributing

    Contributions to the Stock Analysis Dashboard are welcome! Please read our CONTRIBUTING.md for guidelines on how to contribute.

    License

    This project is licensed under the MIT License – see the LICENSE.md file for details. Acknowledgements

    • Panel for the web app framework
    • Cufflinks and Plotly for data visualization
    • The open-source community for continuous support

    Disclaimer

    standa is for informational purposes only and does not constitute financial advice.

    Visit original content creator repository https://github.com/fayssal-elmofatiche/standa
  • Eye-Gaze_and_Blink-detection-using-Neural-Network

    forthebadge
    forthebadge
    forthebadge

    Realtime GAZE & BLINK Detection.

    In this project, we use Neural Networks for the detection of Eyeblink and Eyegaze concurrently. For that, we use 2 pre-trained Neural Networks. One network is used for the detection of eye-blink and another is used for the detection of ‘Left’, ‘Right’, and ‘Center’ gaze of the eye. For the detection of the eye, we use dlib library.

    A quick demo can be found HERE

    How it works

    For each frame in a second:

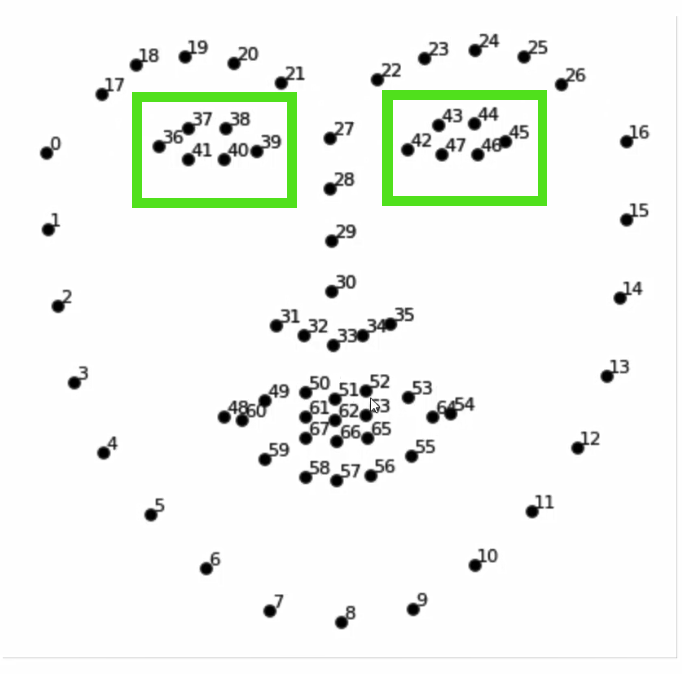
    1. Using Dlib frontal face detector all of the 68 facial landmarks co-ordinates are detected and the co-ordinates are converted into numpy array.
    2. Pass 36,37,38,39,40,41th index of array to the crop_eye() function as it contains co-ordinates of respective landmarks and function returns cropped image for left eye.
    3. Similarly pass 42,43,44,45,46,47 index to get cropped image of right eye.

    4. Pass the cropped eye images through the model for the detection of the eye’s state.
    5. If the opening of the left eye and opening of the right eye is less than 10% then it is registered as blink and gaze is determined through the index of highest value in the array returned by the model.
    1. Show all the status and results in the final window.

    Alt Text

    Dependencies

    This code was developed on:

    python == 3.7.0
    opencv-python == 4.3.0.36
    tensorflow==2.3.0
    dlib == 19.20.0
    imutils==0.5.3
    

    I was able to achieve more the 20 fps on GTX 1050 and more than 15 fps on i5-7300HQ.

    visitors

    Visit original content creator repository https://github.com/R4j4n/Eye-Gaze_and_Blink-detection-using-Neural-Network
  • magento-2-social-login

    The Most Popular Magento 2 Social Login Extension

    Magento 2 Social Login extension is designed for quick login to your Magento store without procesing complex register steps. Let say goodbye the complicated registration process and ignore a lot of unnecessarily required fields. Magento 2 Social Login extension is simply and powerful tool to integrate your Magento customer account to Facebook, Google Plus, Twitter, LinkedIn, and Instagram channel. Logging in via the social medias is the great idea to enhance your customer’s satisfaction.

    Highlight features for Social Login

    • Quickly login step with five most common social channels
    • Easy to change the personal information after registering
    • The biggest preparation step for the loyalty of customers

    Latest Stable Version Total Downloads

    1. Mageplaza Social Login Documentation

    2. How to install Magento 2 Social Login

    ✓ Install Social Login via composer (recommend)

    Run the following command in Magento 2 root folder:

    With Marketing Automation (recommend):

    composer require mageplaza/magento-2-social-login mageplaza/module-smtp
    php bin/magento setup:upgrade
    php bin/magento setup:static-content:deploy
    

    Without Marketing Automation:

    composer require mageplaza/magento-2-social-login
    php bin/magento setup:upgrade
    php bin/magento setup:static-content:deploy
    

    ✓ Install ready-to-paste package

    3. Social Login FAQs

    Q: When I click on Login link, the popup does’t work

    A: You can read https://github.com/mageplaza/magento-2-social-login/issues/39

    Q: I am using custom theme, it is compatible with our design?

    A: We have developed Social Login based on Magento 2 coding standard and best practice test on Magento Community and Magento Enterpise site. So it is compatible with themes and custom designs. Ask Magento community on http://magento.stackexchange.com/ or https://github.com/mageplaza/magento-2-social-login/issues/

    Q: Can I install it by myself?

    A: Yes, you absolutely can! You can install it like installing any extensions to website, follow our Installation Guide http://docs.mageplaza.com/kb/installation.html. User guide: https://docs.mageplaza.com/social-login-m2/index.html

    Q: I got this message Erro: invalid_scope

    A: Read this https://github.com/mageplaza/magento-2-social-login/issues/42

    Q: I got error: Mageplaza_Core has been already defined

    A: Read solution: https://github.com/mageplaza/module-core/issues/3

    Q: My site is down

    A: Please follow this guide: https://www.mageplaza.com/blog/magento-site-down.html

    4. Social Login user guide

    Customers are not patient enough to fill a lot of required information while those are available in social account as Facebook, LinkedIn,…. Mageplaza Social Login extension, your customers only need to click on the social button and all necessary information is completed automatically.That is the main reason why Magento 2 Social Login extension is considered as the great solution for that convenience.

    Login to Magento Admin and do as the following:

    Magento 2 social login

    General Configuration

    Enable Social Login

    Go to Admin Panel > Social Login > Settings > General

    enable social login

    Select Yes option in order to allow customers to sign in quickly via social channels they are using.

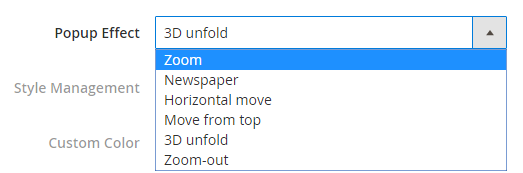
    Setting Social Login popup effect

    Go to Admin Panel > Social Login > Settings > General

    Right after activating, all of available social buttons are shown on Sign In box while the page will appear instantly on Home page without any navigation to other site.

    Admin can choose one of nice effects as you need by block in Popup Effect field.

    Magento 2 social login popup

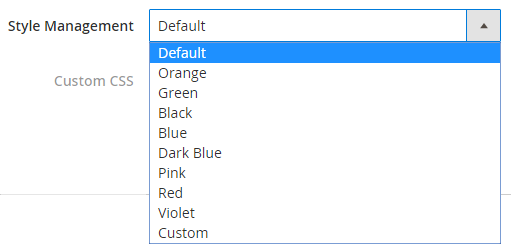
    Custom color of checkbox

    Go to Admin Panel > Social Login > Settings > General

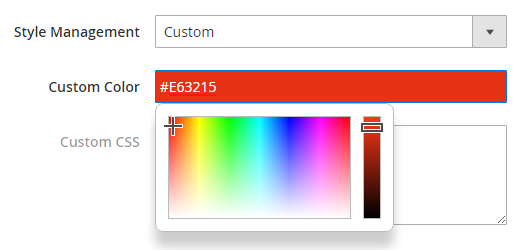
    Mageplaza Social Login provides a Magento 2 default color and 8 popular colors for your design, you can choose custom color which fit with your store design.

    social color

    Especially, now we also support you 9th color that you can freely custom depends on needs of yourself. It is unlimited color to design the style of Sign In box
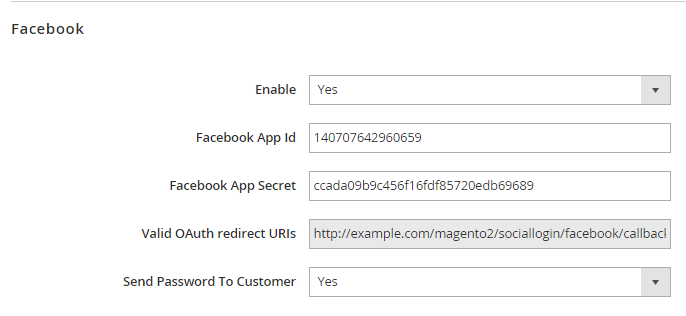
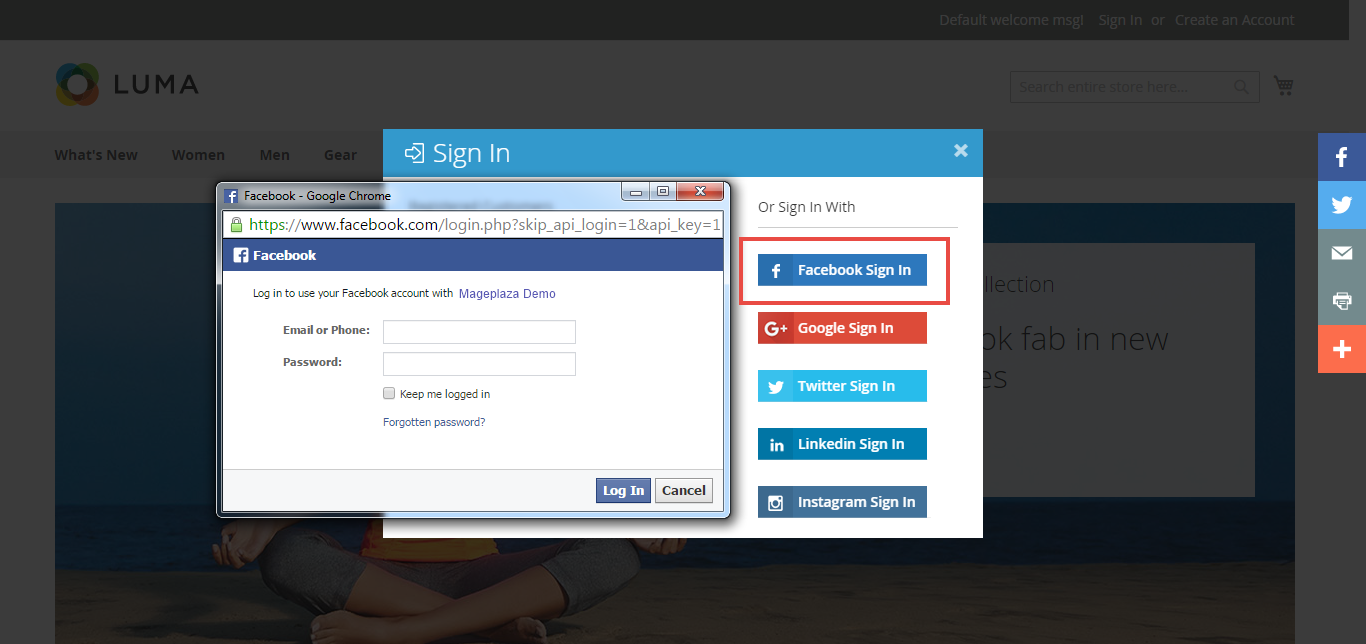
    custom color social login

    Facebook Sign In

    How to configure Facebook Login

    Go to Admin Panel > Social Login > Settings > Facebook

    Magento 2 social login with facebook sign-in button

    • Choose Yes or No to enable or disable Facebook Sign In button on the front-end with Facebook App ID and Facebook App Secret.

    • If customers login via Facebook App, you can send email notification about their account’s password on your site or not, that depends on setting in Send Password to Customer field.

    Login using Facebook account

    Magento 2 Login using Facebook

    The login box will display as popup checkbox after clicking on Facebook Sign In button.
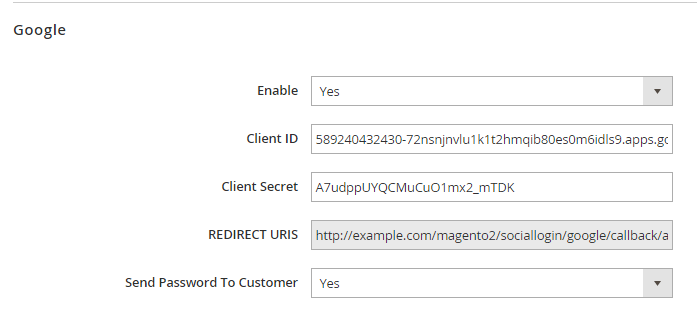
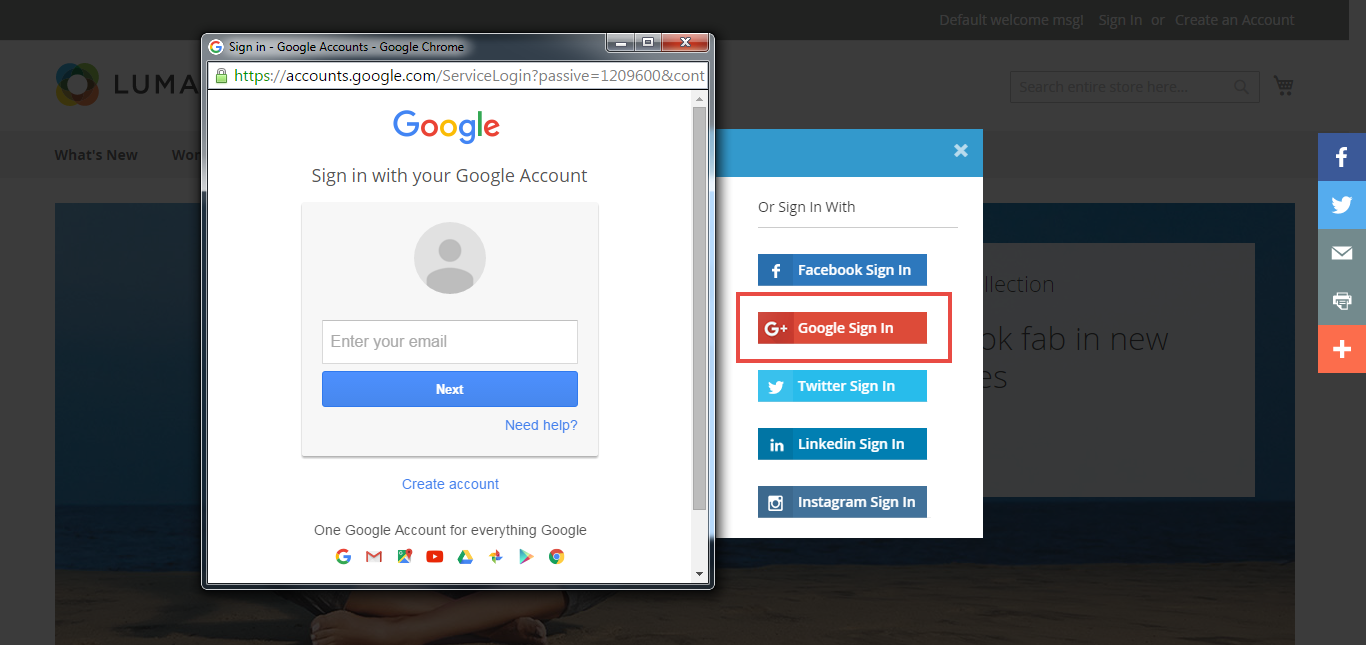
    Google Sign In

    How to configure Google Login

    Go to Admin Panel > Social Login > Settings > Google

    Magento 2 social login with google sign-in button

    • Choose Yes or No to enable or disable Google Sign In button on the front-end with Client ID and Client Secret.

    • If customers login via Google, you can send email notification about their account’s password on your site or not, that depends on setting in Send Password to Customer field.

    Login using Google account

    Magento 2 login using Google

    The login box will display as popup checkbox after clicking on Google Sign In button.
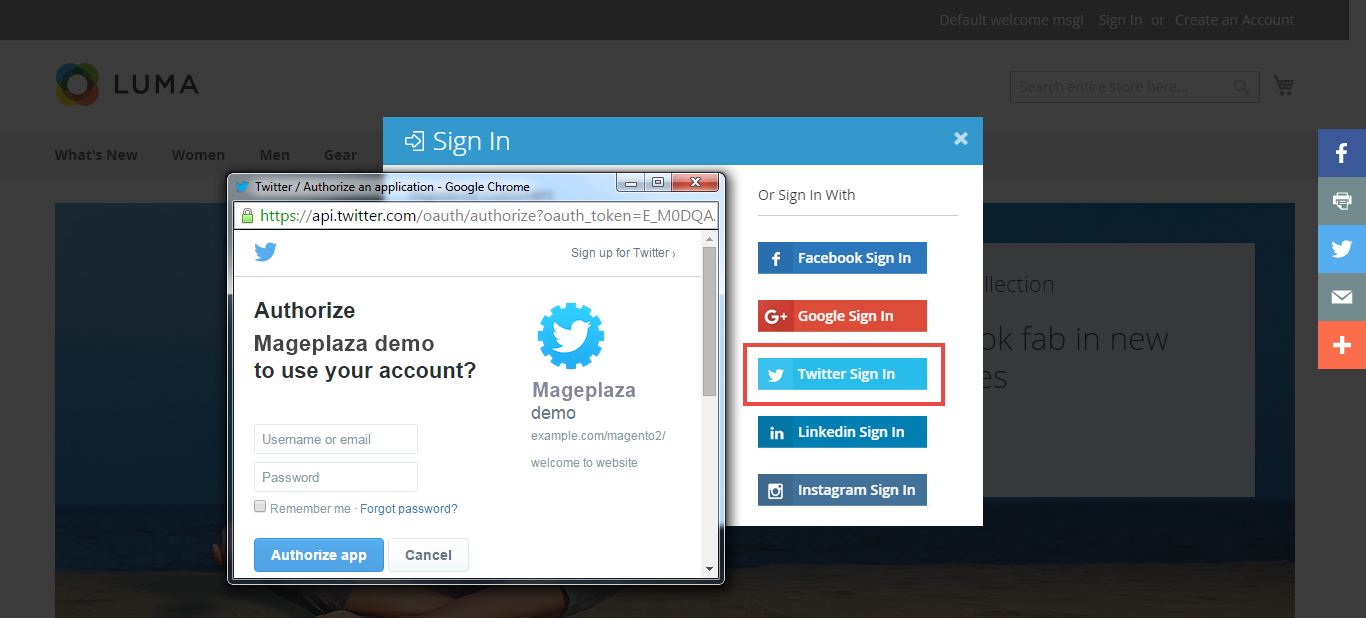
    Twitter Sign In

    How to configure Twitter Login

    Go to Admin Panel > Social Login > Settings > Twitter

    Magento 2 social login with  twitter sign-in button

    • Choose Yes or No to enable or disable Twitter Sign In button on the front-end with Consumer Key and Consumer Secret.

    • If customers login via Twitter, you can send email notification about their account’s password on your site or not, that depends on setting in Send Password to Customer field.

    Login using Twitter account

    Magento 2 Login using Twitter

    The login box will display as popup checkbox after clicking on Twitter Sign In button.
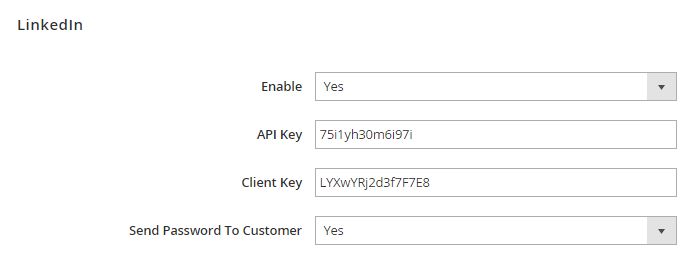
    LinkedIn Sign In

    How to configure LinkedIn Login

    Go to Admin Panel > Social Login > Settings > LinkedIn

    Magento 2 social login with  linkedin sign in button

    • Choose Yes or No to enable or disable LikedIn Sign In button on the front-end with API Key and Client Key.

    • If customers login via LinkedIn, you can send email notification about their account’s password on your site or not, that depends on setting in Send Password to Customer field.

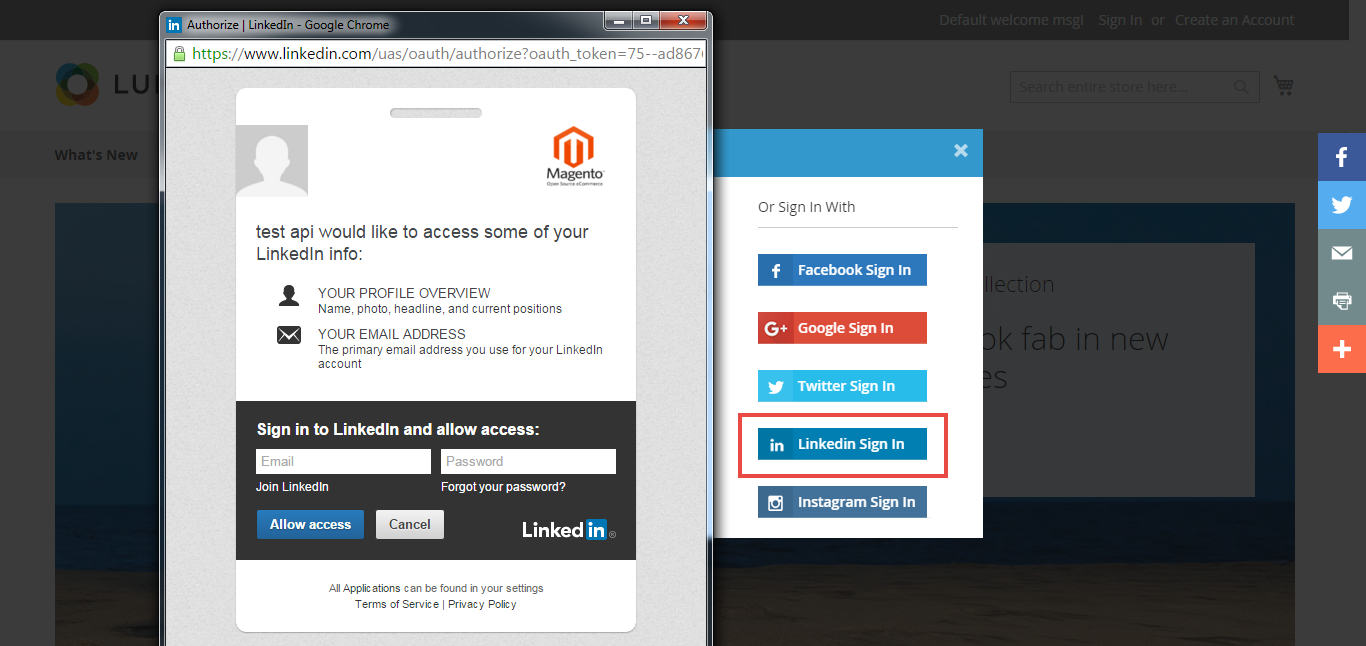
    Login using LinkedIn account

    Magento 2 Login using LinkedIn

    The login box will display as popup checkbox after clicking on LinkedIn Sign In button.

    Mageplaza extensions on Magento Marketplace, Github

    Magento 2 One Step Checkout extension

    Magento 2 SEO Module

    Magento 2 Blog extension

    Magento 2 Layered Navigation extension

    Magento 2 Blog module

    Magento 2 Social Login module

    Magento 2 SEO Module

    Magento 2 SMTP Module

    Magento 2 Product Slider Module

    Magento 2 Banner Module

    People alse search:

    • social login magento 2
    • magento 2 facebook login
    • mageplaza social login magento 2
    • magento 2 social login extension
    • magento 2 login with facebook
    • magento 2 social login extension free
    • magento 2 login popup extension free
    • magento 2 social login free
    • magento 2 social login free extension
    • mobile number login magento 2 extension free
    Visit original content creator repository https://github.com/mageplaza/magento-2-social-login
  • Software-Solutions-for-Reproducible-ML-Experiments

    Software Solutions for Reproducible ML Experiments

    This repository contains auxiliary material for the article: “A Taxonomy of Tools for Reproducible Machine Learning Experiments” by Luigi Quaranta, Fabio Calefato, and Filippo Lanubile.

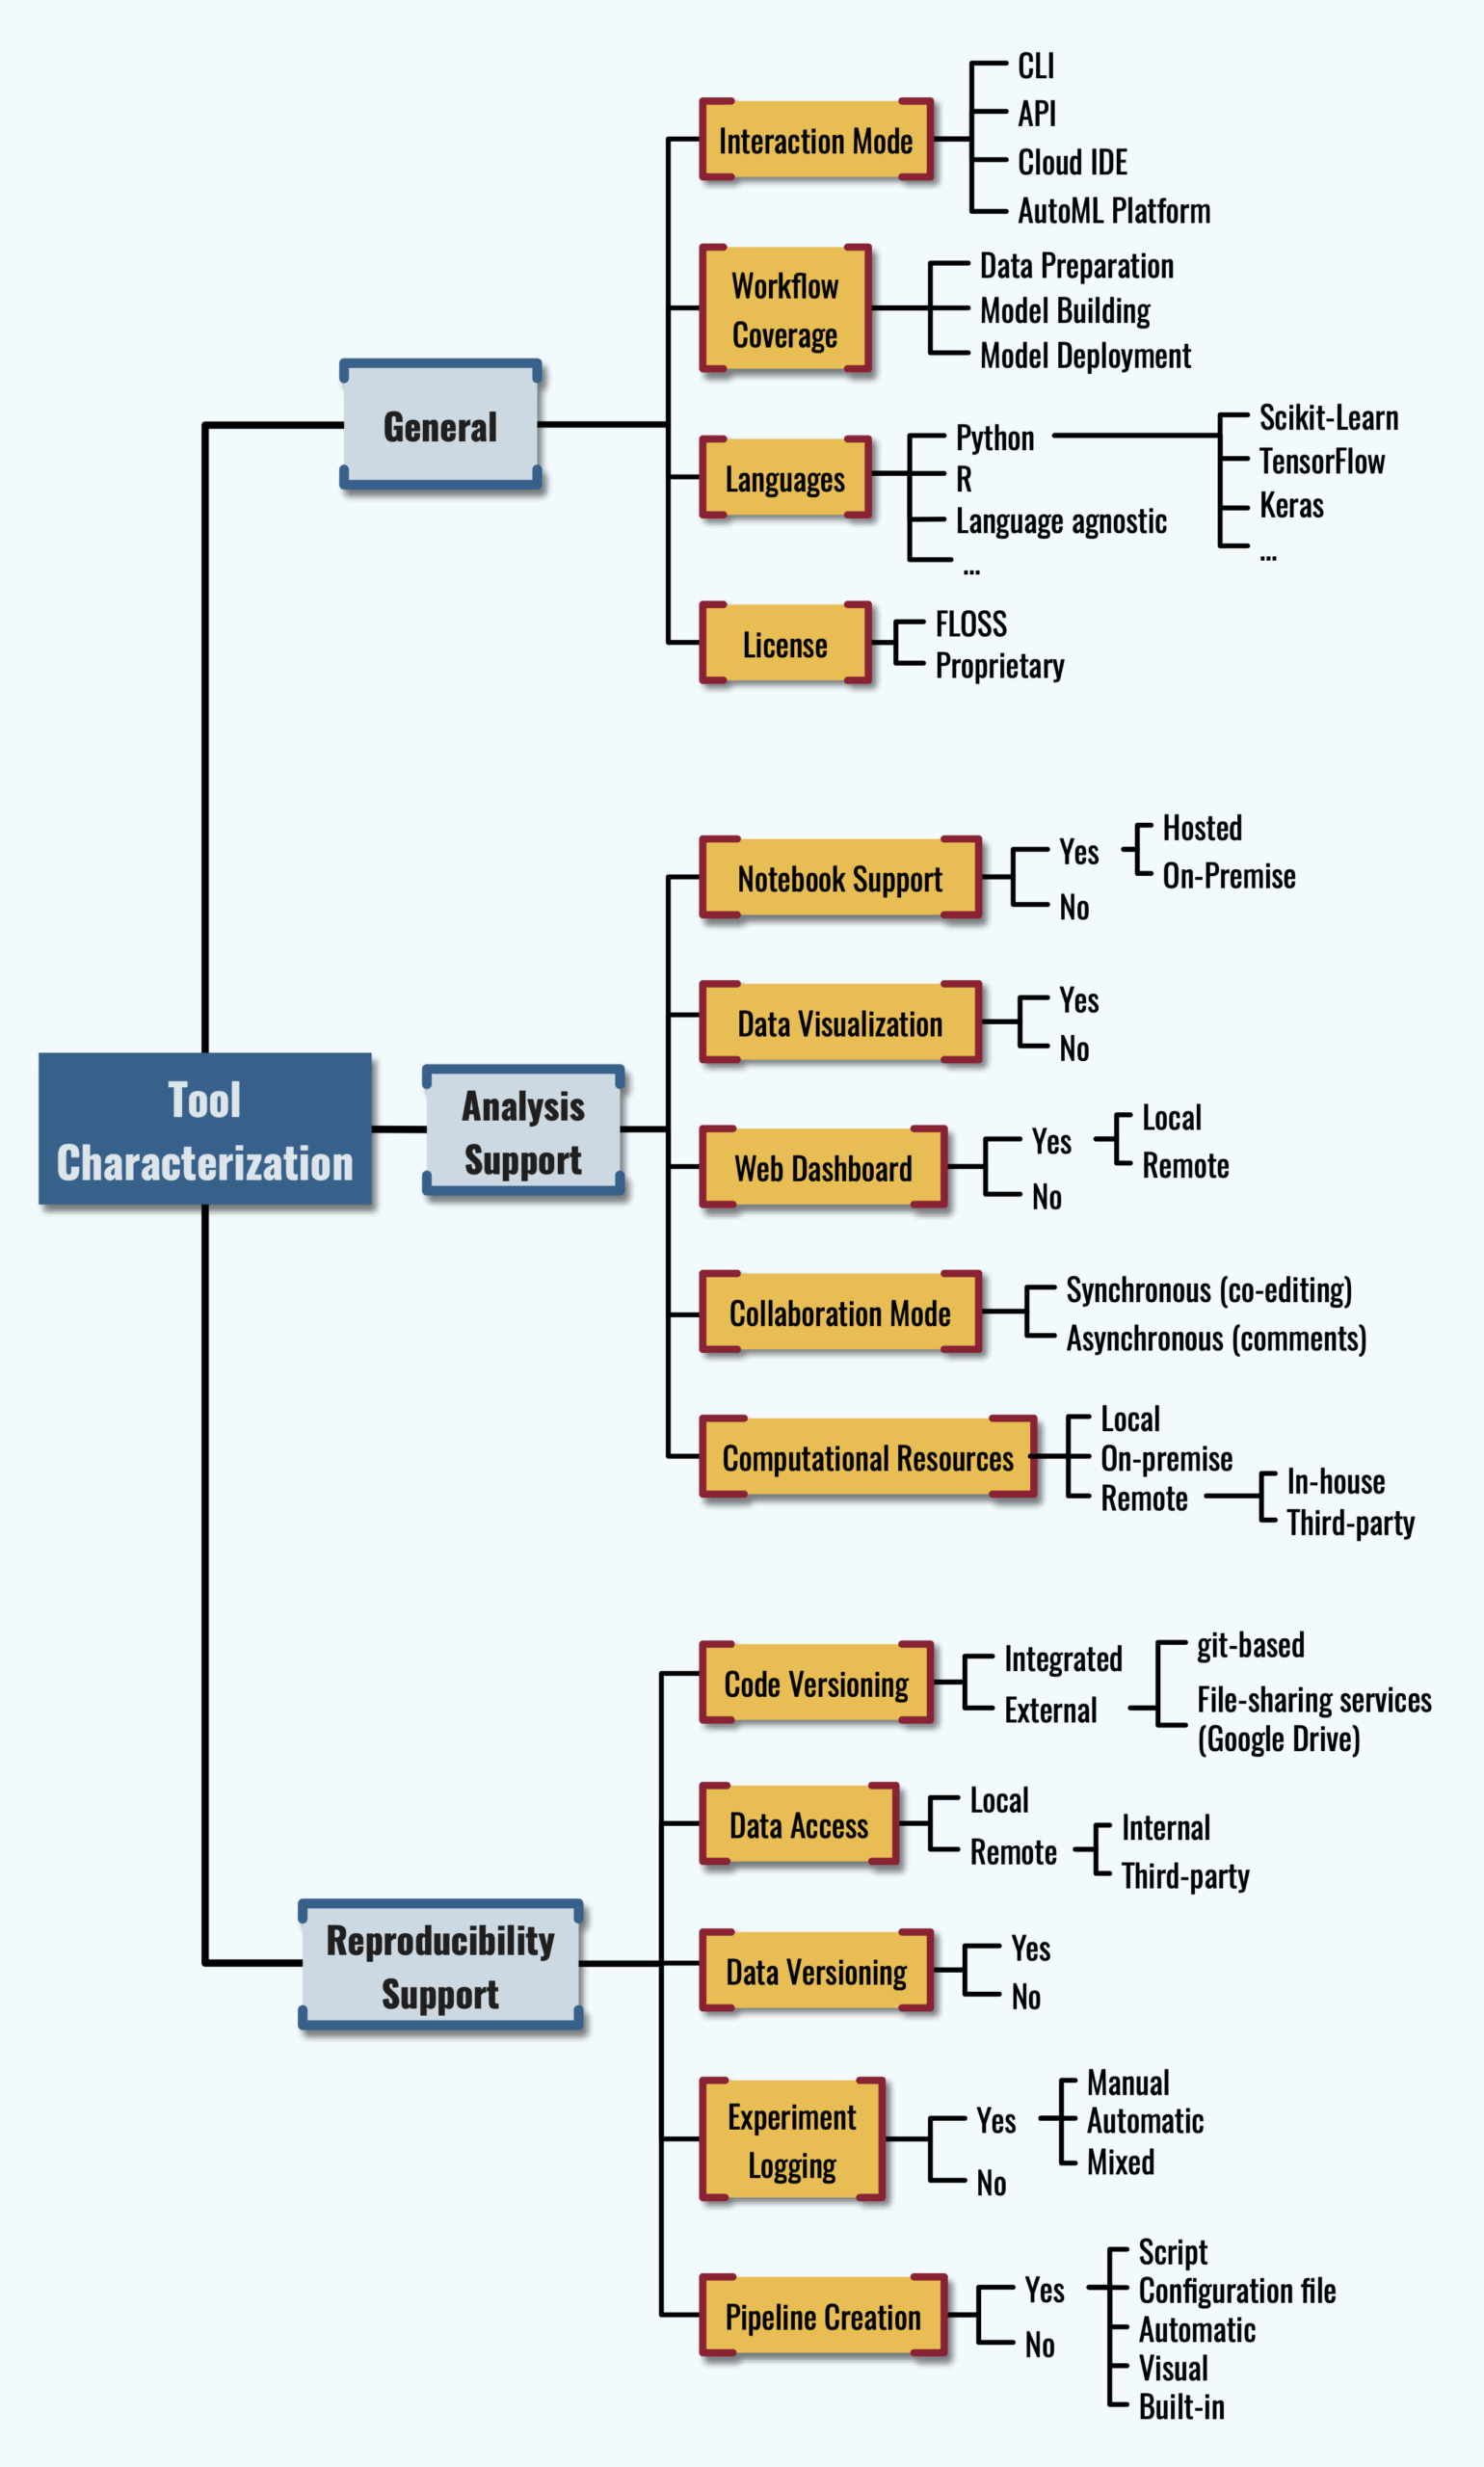
    In the following of this README, the full sample of analyzed tools is classified according to the features from the taxonomy presented in the paper; for the reader’s convenience, a figure representing the taxonomy is also displayed in the following paragraph.

    Creative Commons License
    The tool categorization reported in this README as well as the figure representing the taxonomy are licensed under a Creative Commons Attribution 4.0 International License.

    Please, include the following citation if you intend to (re)use our work:

    L. Quaranta, F. Calefato and F. Lanubile, “A Taxonomy of Tools for Reproducible Machine Learning Experiments,” Proceedings of the AIxIA 2021 Discussion Papers Workshop (AIxIA DP 2021), 2021, pp. 65-76, online: CEUR-WS.org/Vol-3078/paper-81.pdf.

    The Taxonomy

    Taxonomy

    Tools Review

    General

    The tool sample classified according to the features of the General category.

    Interaction Mode Workflow Coverage Languages License
    DVC CLI All Language agnostic FLOSS
    (Apache 2.0)
    Guild AI CLI, API Data Preparation + Model Building Python
    Built-in framework support: TensorFlow, PyTorch, Keras, Scikit-Learn
    FLOSS
    (Apache 2.0)
    Pachyderm CLI, API All Language agnostic Community Ed.:
    FLOSS
    (Apache 2.0)
    Enterprise Ed.:
    Proprietary
    Comet.ml API, CLI Data Preparation + Model Building Python, R, Java (beta)
    Built-in framework support: TensorFlow, PyTorch, Keras, Scikit-Learn, SageMaker
    Proprietary
    MLflow API, CLI All Python, R, Java
    Built-in framework support: Apache Spark, TensorFlow, PyTorch, Keras, Scikit-Learn, H2O
    FLOSS
    (Apache 2.0)
    Neptune API, CLI All Language agnostic (CLI)
    Python and R (API)
    Built-in framework support: TensorFlow, PyTorch, Keras
    MLflow, SageMaker
    Proprietary
    wandb API, CLI Data Preparation + Model Building Python Proprietary
    Valohai CLI, API All Language agnostic Proprietary
    Google Colab Cloud IDE Data Preparation + Model Building Python Proprietary
    FloydHub Cloud IDE, API, CLI All Python
    Built-in framework support: TensorFlow, PyTorch, Keras, Scikit-Learn
    Proprietary
    Domino Cloud IDE, API, CLI All Python, R, Julia
    Built-in framework support: TensorFlow, PyTorch, H2O, Apache Spark, Hadoop
    Proprietary
    Spell.run Cloud IDE, CLI All Python
    Built-in framework support: TensorFlow, Keras
    Weights & Biases
    Proprietary
    Polynote Web-based IDE Data Preparation + Model Building Scala, Python, SQL
    Built-in framework support: Apache Spark
    FLOSS
    (Apache 2.0)
    DataRobot AutoML Platform All Language agnostic
    (Python API)
    Proprietary
    databricks Cloud IDE, API, CLI All Python, R, Scala, SQL
    Built-in framework support: Apache Spark, MLflow, Delta Lake, TensorFlow
    Proprietary
    Driverless AI AutoML Platform All (Python recipes) Proprietary
    RapidMiner AutoML Platform All (Python and R for
    custom code)
    Proprietary
    dstack.ai API Data Preparation Python, R Proprietary
    Dotscience Cloud IDE, API, CLI All Language agnostic (CLI)
    Python (Cloud IDE, API)
    Proprietary

    Analysis Support

    The tool sample classified according to the features of the Analysis Support category.

    Notebook support Data Visualization Web Dashboard Collaboration mode Computational
    Resources
    DVC No No No Async
    (push/pull commands)
    Local
    Guild AI Yes
    (on-premise)
    No Yes
    (local)
    Async
    (push/pull commands)
    Local
    Pachyderm Yes
    (on-premise)
    No Yes
    (local or remote)
    Async
    (push/pull commands)
    Local +
    On-premise +
    Remote (in-house*)
    Comet.ml Yes
    (on-premise)
    No Yes
    (remote)
    No Local +
    On-premise* +
    Remote*
    (in-house)
    MLflow Yes
    (on-premise)
    No Yes
    (local)
    No Local +
    On-premise
    Neptune Yes
    (on-premise)
    No Yes
    (remote)
    Async (comments) On-premise* +
    Remote (in-house)
    wandb Yes
    (on-premise)
    No Yes
    (remote)
    No On-premise* +Remote
    (in-house)
    Valohai Yes
    (on-premise orhosted)
    No Yes
    (remote)
    No On-premise* +
    Remote (in-house)
    Google Colab Yes
    (hosted)
    No No Sync (co-editing) +
    Async (comments)
    Local +
    Remote (in-house or third-party)
    FloydHub Yes
    (hosted)
    No Yes
    (remote)
    No On-premise* +
    Remote (in-house)
    Domino Yes
    (hosted)
    No Yes
    (remote)
    Async (reviews) Remote (in-house*)
    Spell.run Yes
    (hosted)
    No Yes
    (remote)
    No On-premise* +
    Remote (in-house)
    Polynote Yes
    (on-premise)
    Yes No No Local
    DataRobot No Yes Yes
    (remote)
    No On-premise* +
    Remote*
    (in-house or
    third-party)
    databricks Yes
    (hosted)
    Yes Yes
    (remote)
    Sync (co-editing) +
    Async (comments)
    Remote* (third-party)
    Driverless AI No Yes Yes
    (remote)
    No Remote* (in-house or third-party)
    RapidMiner Yes
    (hosted)
    Yes Yes
    (remote)
    No Local +
    Remote* (in-house or third-party)
    dstack.ai Yes
    (on-premise)
    No Yes
    (remote)
    Async (comments) On-premise* +
    Remote
    (in-house)
    Dotscience Yes
    (hosted)
    No Yes
    (remote)
    Async
    (Fork&Pull for notebooks)
    On-premise* +
    Remote (in-house or third-party*)

    Reproducibility Support

    The tool sample classified according to the features of the Reproducibility Support category.

    Code Versioning Data Access Data Versioning Experiment
    Logging
    Reproducible
    Pipeline
    DVC Yes
    (external, git-based)
    Local +Remote (third-party) Yes Yes
    (manual)
    Yes
    (automatic)
    Guild AI Yes
    (external, git-based)
    Local +Remote (third-party) Yes Yes
    (hybrid)
    Yes
    (configuration file)
    Pachyderm Yes
    (integrated)
    Local +Remote (third-party) Yes No Yes
    Comet.ml Yes
    (external, git-based)
    Local +
    Remote (internal)
    Yes Yes
    (hybrid)
    ?
    MLflow Yes
    (external, git-based)
    Local +
    Remote (third-party)
    No Yes
    (hybrid)
    Yes
    (configuration file)
    Neptune Yes
    (integrated orexternal, git-based)
    Local +
    Remote (third-party)
    No Yes
    (hybrid)
    No
    wandb Yes
    (external, git-based)
    Local +
    Remote (internal orthird-party)
    No Yes
    (hybrid)
    Local +
    Remote (third-party)
    Valohai Yes
    (integrated or
    external, git-based)
    Local +
    Remote (third-party*)
    Yes Yes
    (manual)
    Yes
    (configuration file)
    Google Colab Yes
    (file-sharing services – Google Drive)
    Remote (internal orthird-party) Yes No No
    FloydHub Yes (integrated orexternal, git-based) Remote (internal orthird-party) Yes Yes
    (manual)
    Yes
    Domino Yes
    (integrated)
    Remote (internal orthird-party) Yes No Yes
    (automatic)
    Spell.run Yes
    (external, git-based)
    Remote (internal orthird-party) ? Yes
    (hybrid)
    Yes
    (script)
    Polynote No Local No No No
    DataRobot ? Remote ? Yes
    (automatic)
    Yes
    (built-in)
    databricks Yes (integrated orexternal, git-based) Remote (internal orthird-party) Yes Yes
    (hybrid)
    ?
    Driverless AI Yes
    (integrated)
    Remote
    (internal or third-party)
    Yes Yes
    (automatic)
    Yes
    (built-in)
    RapidMiner Yes
    (external, git-based)
    Local +
    Remote (third-party)
    ? Yes
    (automatic)
    Yes
    (visual or built-in)
    dstack.ai No Local +
    Remote (internal)
    Yes Yes
    (manual)
    No
    Dotscience Yes
    (integrated)
    Remote
    (internal or third-party)
    Yes Yes
    (manual)
    Yes
    (automatic)

    * = only available in paid plans

    N.B.: Rows related to Dotscience are strike-through because the service seems to be shutting down. We read this blog post a few days after our trial.


    Repository contents

    The tools/ folder contains environment templates for the tools that require a local installation to be executed. To try the tools we used — where possible — a realistic case study inspired to the lessons of the Kaggle’s micro-courses “Intro to Machine Learning” and “Intermediate Machine Learning”. The kernels/ folder contains template notebooks implementing the case study, while the sample dataset is stored in the input/ folder.

    Setup instructions

    To try one of the reviewed tools, follow these steps:

    1. go to the tool’s folder: /tools/<tool_name>;
    2. if a .env_template file exist, make a copy of it; give the name .env to the copy; edit .env giving a value to each of the mentioned variables.
    3. if a README.md file is present, follow the specific instruction there.
    Visit original content creator repository https://github.com/collab-uniba/Software-Solutions-for-Reproducible-ML-Experiments
  • unlicense

    Unlicense

    GitHub release Minimum Python version CI status

    A Python 3 tool to dynamically unpack executables protected with Themida/WinLicense 2.x and 3.x.

    Warning: This tool will execute the target executable. Make sure to use this tool in a VM if you’re unsure about what the target executable does.

    Note: You need to use a 32-bit Python interpreter to dump 32-bit executables.

    Features

    • Handles Themida/Winlicense 2.x and 3.x
    • Handles 32-bit and 64-bit PEs (EXEs and DLLs)
    • Handles 32-bit and 64-bit .NET assemblies (EXEs only)
    • Recovers the original entry point (OEP) automatically
    • Recovers the (obfuscated) import table automatically

    Known Limitations

    • Doesn’t handle .NET assembly DLLs
    • Doesn’t produce runnable dumps in most cases
    • Resolving imports for 32-bit executables packed with Themida 2.x is pretty slow
    • Requires a valid license file to unpack WinLicense-protected executables that require license files to start

    How To

    Download

    You can either download the PyInstaller-generated executables from the “Releases” section or fetch the project with git and install it with pip:

    pip install git+https://github.com/ergrelet/unlicense.git
    

    Use

    If you don’t want to deal the command-line interface (CLI) you can simply drag-and-drop the target binary on the appropriate (32-bit or 64-bit) unlicense executable (which is available in the “Releases” section).

    Otherwise here’s what the CLI looks like:

    unlicense --help
    NAME
        unlicense.exe - Unpack executables protected with Themida/WinLicense 2.x and 3.x
    
    SYNOPSIS
        unlicense.exe PE_TO_DUMP <flags>
    
    DESCRIPTION
        Unpack executables protected with Themida/WinLicense 2.x and 3.x
    
    POSITIONAL ARGUMENTS
        PE_TO_DUMP
            Type: str
    
    FLAGS
        --verbose=VERBOSE
            Type: bool
            Default: False
        --pause_on_oep=PAUSE_ON_OEP
            Type: bool
            Default: False
        --no_imports=NO_IMPORTS
            Type: bool
            Default: False
        --force_oep=FORCE_OEP
            Type: Optional[Optional]
            Default: None
        --target_version=TARGET_VERSION
            Type: Optional[Optional]
            Default: None
        --timeout=TIMEOUT
            Type: int
            Default: 10
    
    NOTES
        You can also use flags syntax for POSITIONAL ARGUMENTS
    
    Visit original content creator repository https://github.com/ergrelet/unlicense
  • issue2csdn

    issue2csdn

    GitHub Action which converts GitHub Issue to CSDN post.

    Example

    cloudswave/blog

    Usage

    name: Issue to CSDN
    on:
      issues:
        # Sufficient to trigger this workflow when an issue is milestoned
        types: [milestoned]
        # types: [unlabeled, labeled, edited, milestoned]
    
    jobs:
      build:
        runs-on: ubuntu-latest
        if: ${{ github.actor == github.repository_owner }}
        steps:
          - uses: actions/checkout@v2
          - name: Use Node.js 16.x
            uses: actions/setup-node@v2
            with:
              node-version: '16'    
          # use here
          - uses: cloudswave/issue2csdn@main
            with:
              issue_url: ${{ github.event.issue.html_url }}
              token: ${{ secrets.GITHUB_TOKEN }}
              csdn_cookie: ${{ secrets.CSDN_COOKIE }}
              ## optional below
              markdowncontent: |
                ${{ github.event.issue.body }}
                
                _本文同步于个人Github博客:[${{ github.event.issue.html_url }}](${{ github.event.issue.html_url }}),欢迎留言。_
    concurrency: 
      group: ${{ github.workflow }}-${{ github.event.issue.number }}
      cancel-in-progress: true   
    

    Action Params

    Key Value Information Type Required
    token The token to use to access the GitHub API, you can use the ${{ secrets.GITHUB_TOKEN }} secrets Yes
    csdn_cookie The cookie after login csdn. see the guide secrets Yes
    issue_url The blog issue link. you can use the ${{ github.event.issue.html_url }} env Yes
    markdowncontent The markdowncontent for csdn post, Default the issue content env false

    Warning

    Don’t delete the <!--csdn-article-id:***--> at the end of the issue content, It is used to update the csdn blog when the issue is updated.

    Visit original content creator repository
    https://github.com/cloudswave/issue2csdn

  • pandas_zoo

    Pandas Zoo

    drawing

    drawing

    🐼 A zoo for pandas methods, functions, usages! 🐼

    Search for any feature you need by key words.

    A short code snippet will be attached to the features so you can easily apply it to your work.

    before copy & paste the snippet, make sure you imported packages as below.

    import pandas as pd
    import numpy as np

    판다스의 다양한 기능을 소개하는 repo 입니다!

    원하는 기능을 바로 찾아 쓸 수 있도록 정리할 예정입니다.

    사용하고자 하는 목적에 맞게 바로 적용할 수 있도록, 코드 스니펫을 첨부합니다.

    코드 복붙 전에, 판다스와 넘파이를 잘 호출 하셨는지 확인해 주세요.


    Example

    1. 사용자 지정 함수 적용하기 (Applying lambda function to Pandas Series)

    [키워드 key words]
    • 람다, 함수, 맵핑
    • apply, mapping, custom function, column
    # daily bamboo and water consumption in pandas zoo
    
    panda_consumption = {'Day' : [1, 2, 3, 4, 5, 6],
                    'Cum_Bamboo': [20, 30, 60, 100, 120, 150],
                    'Cum_Water': [15, 30, 45, 70, 90, 120],
                    }
    
    # make dataframe
    DF = pd.DataFrame.from_dict(panda_consumption)
    
    # add 50 to every consumption of Water
    DF.Cum_Water.apply(lambda x: x+50)

    drawing


    Contents

    1. 데이터 프레임 DataFrame
    2. 조회하기 Descriptive
    3. 결측치 처리 Missing Values and Imputation
    4. 행/열에 조건 걸기 Filter
    5. 인덱싱 Indexing
    6. 함수 적용하기 Apply a Function
    7. 그룹별 조작하기 Groupby / Aggregating
    8. 시계열 Time Series
    9. 시각화 Plot
    10. 기타 Etc

    1. 데이터 프레임 만들기 Create and Load click here!


    1. 리스트로 새로운 데이터프레임 만들기 (Creating new DataFrame from lists)

    2. 딕셔너리로 새로운 데이터 프레임 만들기 (Creating new DataFrame from dict of lists)

    3. 복수의 데이터 프레임 병합하기 (merging multiple(more than 2) DataFrames)

    4. 기존의 데이터프레임에 새로운 행 추가하기 (Appending a new row to an existing DataFrame)

    5. 새로운 열을 추가하지 않고 기존의 열에 새로운 값을 병합하기 (replacing columns using existing DF)
      pd.update


    2. 조회하기 Descriptive click here!


    1. 기술 통계량 조회하기 (Getting desriptive statistics from dataframe)
    2. 열 별로 다양한 기술 통계량 확인하기 (Checking specific statistics from columns)
    3. 열 내의 유니크한 카테고리 별로 개수/비율 구하기 (Counting numbers of sample / Calculting proportion per category in a column)

    3. 결측치 처리 Missing Values and Imputation click here!


    1. 열 별로 결측치가 포함된 레코드의 수 세기 (Determining the number of NA values in columns)

    2. 결측 포함된 행/열 날리기 (Droping rows/cols with NA values) pd.dropna


    4.행/열에 조건 걸기 Filter click here!


    1. 특정 단어를 포함한 row만 골라내기 (Getting rows that contain specific text/word/string)
      pd.Series.str.contains

    2. 데이터프레임 열(시리즈) 내에서 리스트 내의 특정 값이 있는 행 골라내기 (Using a list of values to select rows from Data Frame) pd.Series.isin

    3. 중복되는 행 제거하기, 열(복수 가능) 기준 혹은 전체 행 기준 (Droping duplicated/repeated/redundant rows, in respect to column(s) or full row) pd.drop_duplicates

    5. 인덱싱 Indexing click here!


    1. loc로 새로운 칼럼 할당하기 (Assigning a new column using loc method)

    2. 원하는 데이터 타입의 칼럼만 선택하기 (Selecting columns by specific data types)


    6. 함수 적용하기 Apply click here!


    1. 사용자 지정 함수 적용하기 (Applying lambda function to Pandas Series)
    2. 문자열 행에서 마지막 n개 단어 취하기 (getting last n characters from a string column)
    3. 열에 if else 조건문 적용하기 (applying if else statement to a column)
    4. apply에 여러개 인자 넣어주기 (multiple argument for apply statement in DF)

    7. 그룹별 조작하기 Groupby click here!


    1. 그룹 별로 평균 값 구하기 (Getting average value of each column per group)

    2. 그룹 별로 Multi level one-hot encoding 하기 (one-hot encoding for multi-level column data)


    8. 시계열 Time Series click here!


    1. 행 별 차이 구하기, 차분 (Getting difference between rows)

    9. 시각화 Plot click here!


    1. 판다스 시리즈 데이터 시각화하기 (Drawing a quick plot using pandas series)

    10. 기타 etc click here!


    1. 출력 결과 확장하기 (Expanding pandas output to be shown)
    Visit original content creator repository https://github.com/myeonghak/pandas_zoo